Class Schedule
Select step-by-step instructions on how to add in your class schedules.
Adding a class
Adding a class
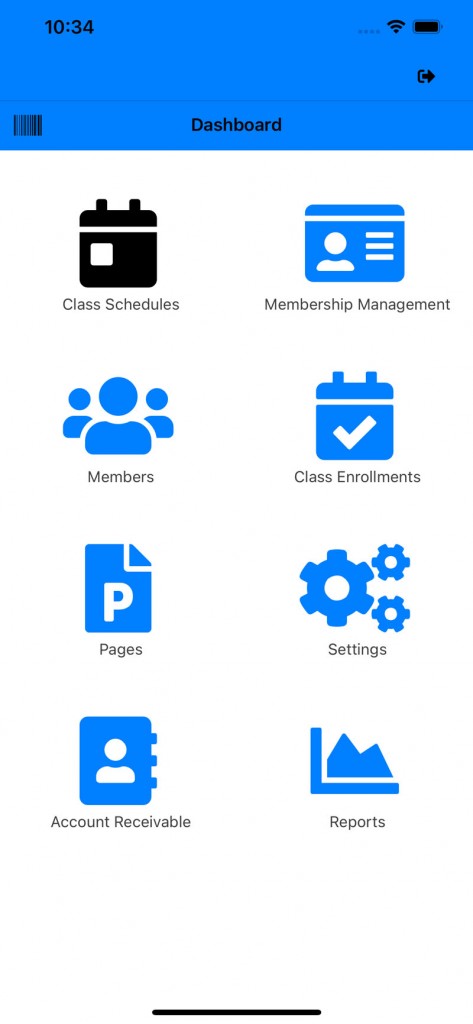
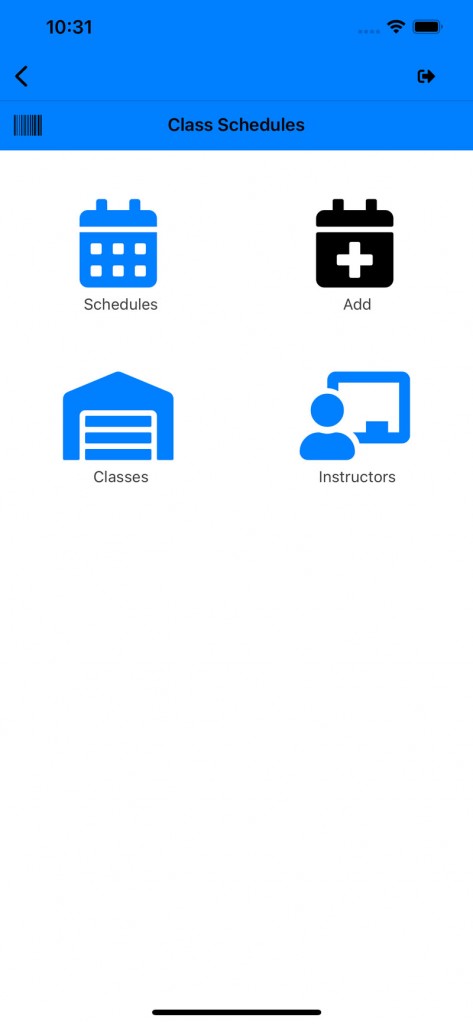
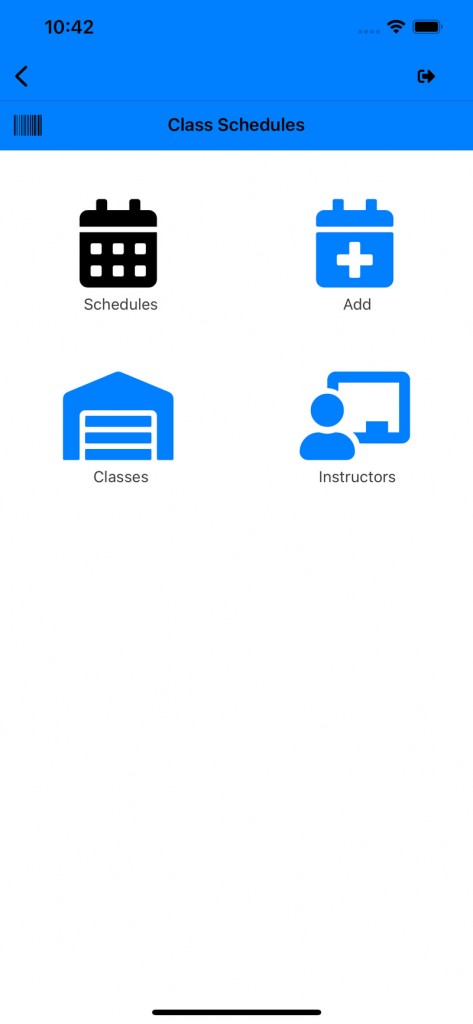
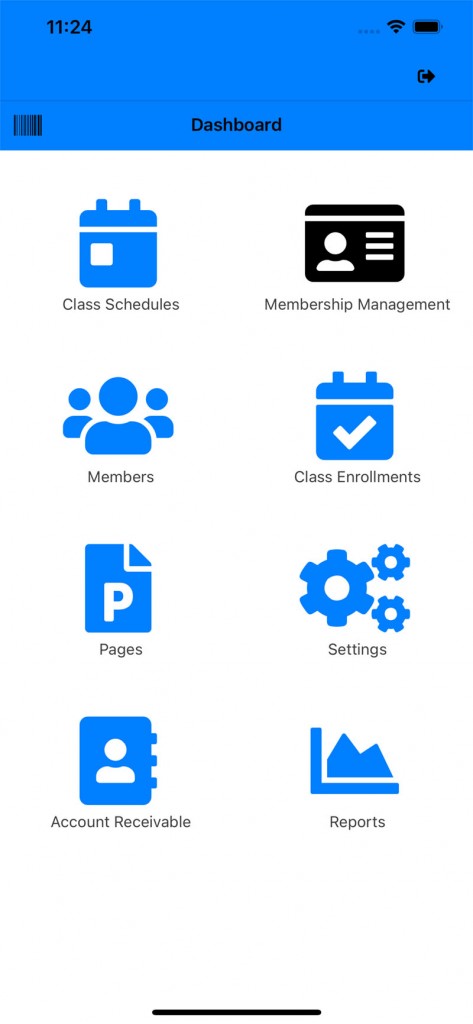
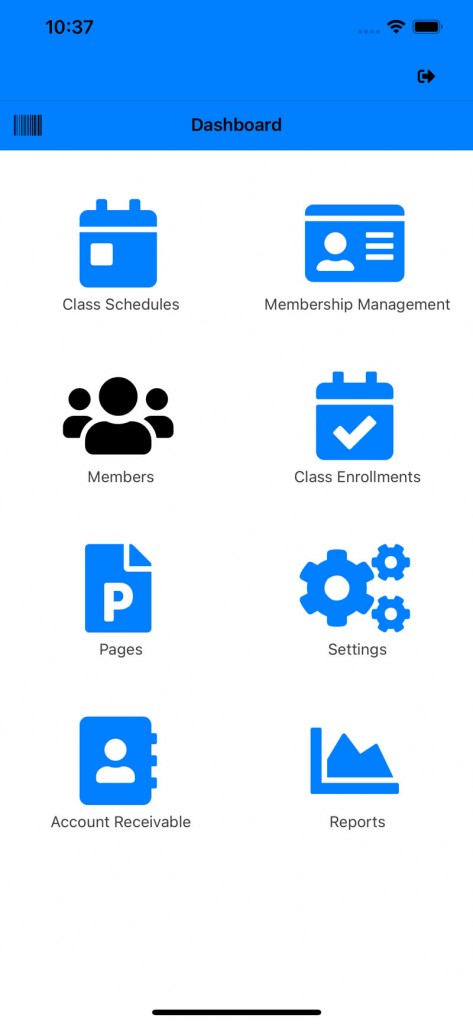
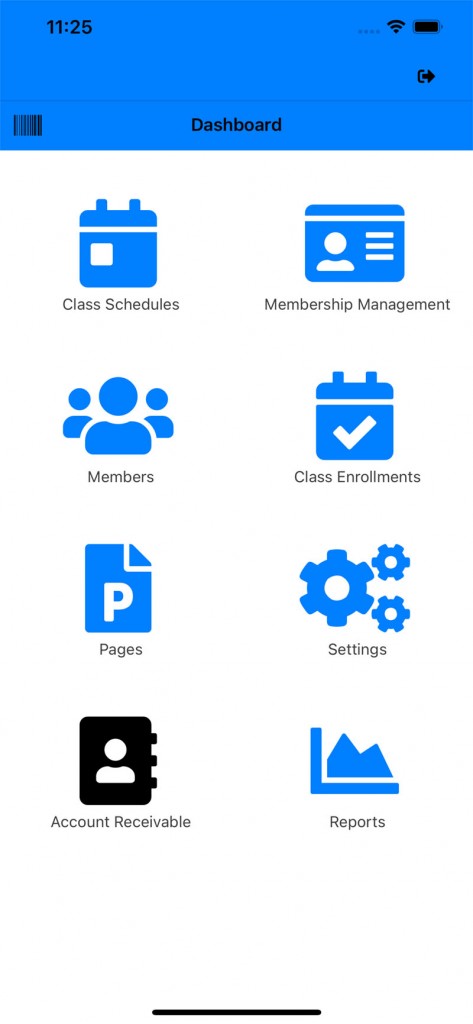
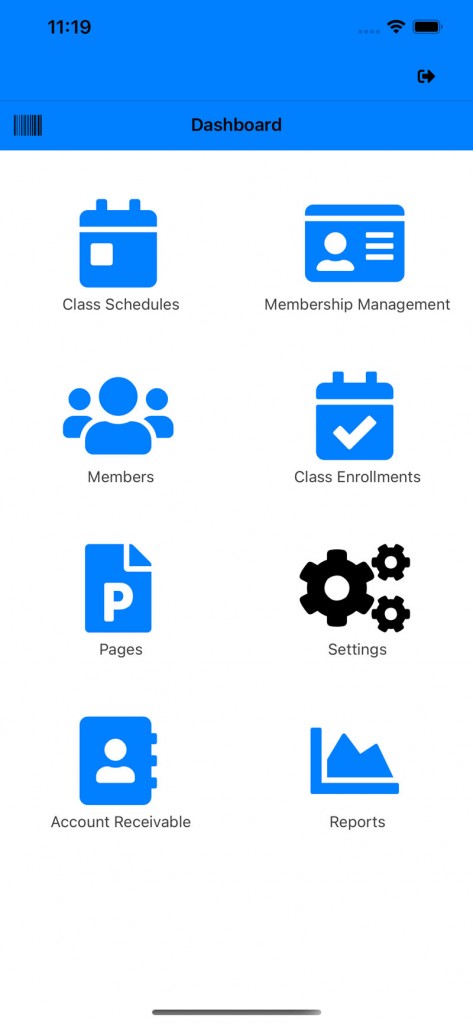
1.) Go to your Dashboard and click on "Class Schedule":
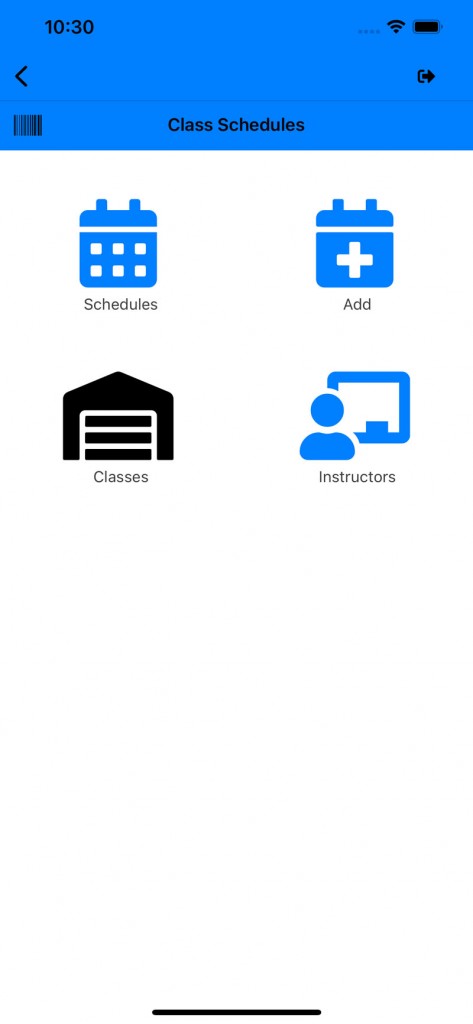
2.) Click on the "Classes" icon:
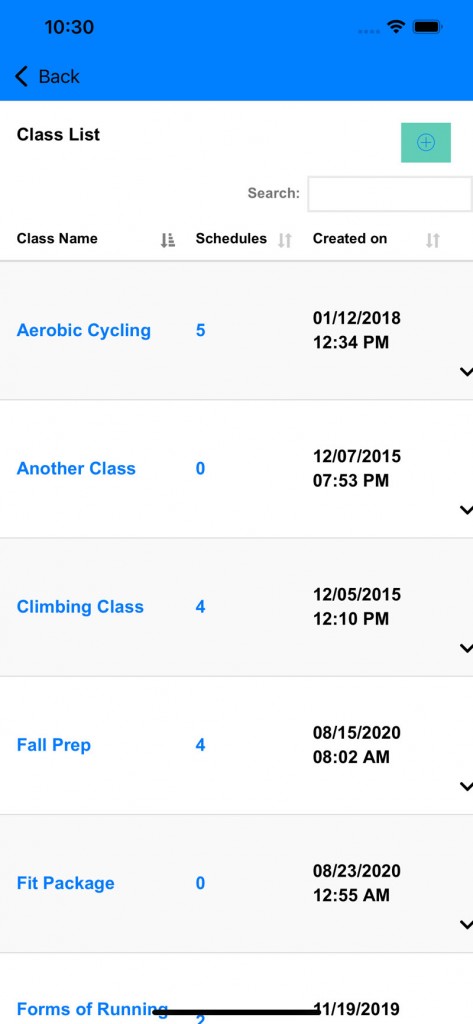
3.) A class list page will open:
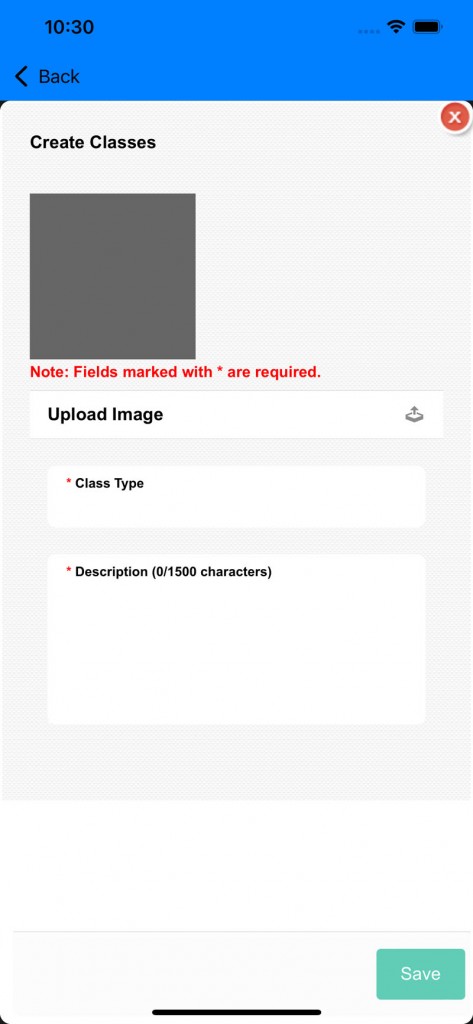
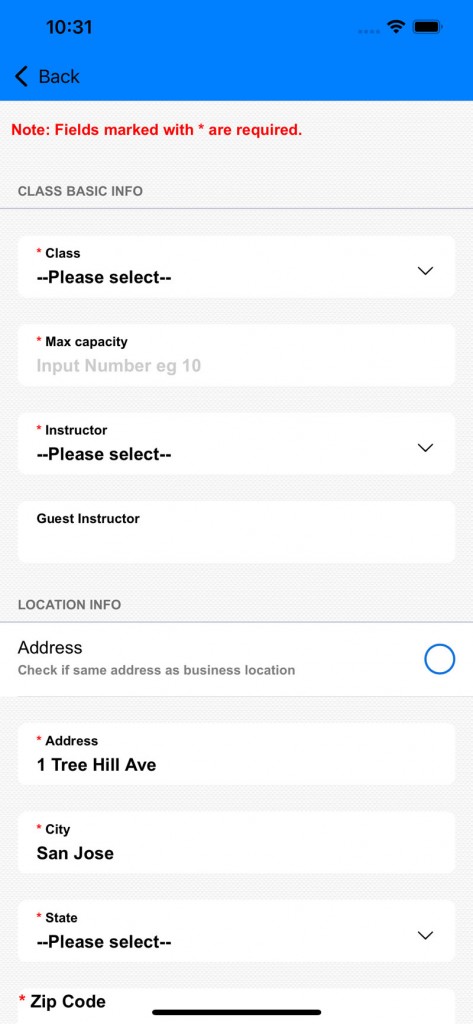
4.) Add in class info:
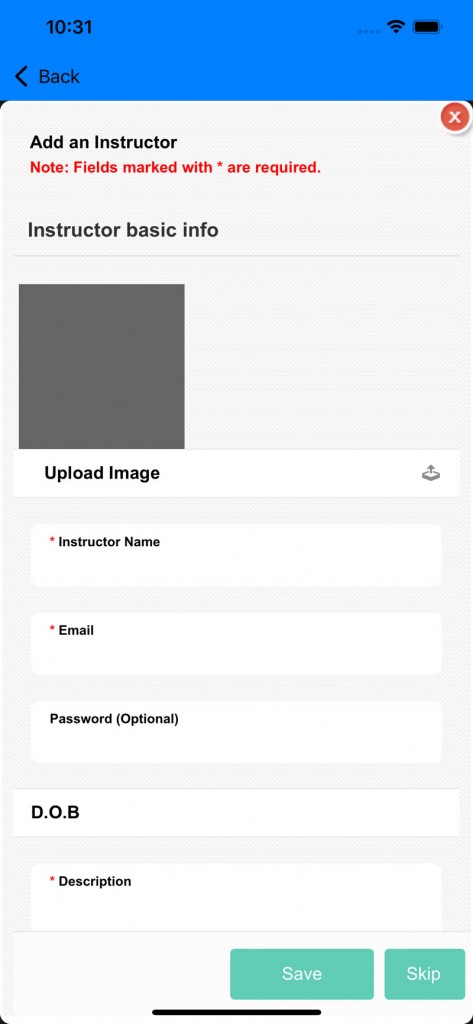
5.) Add in instructor info for class:
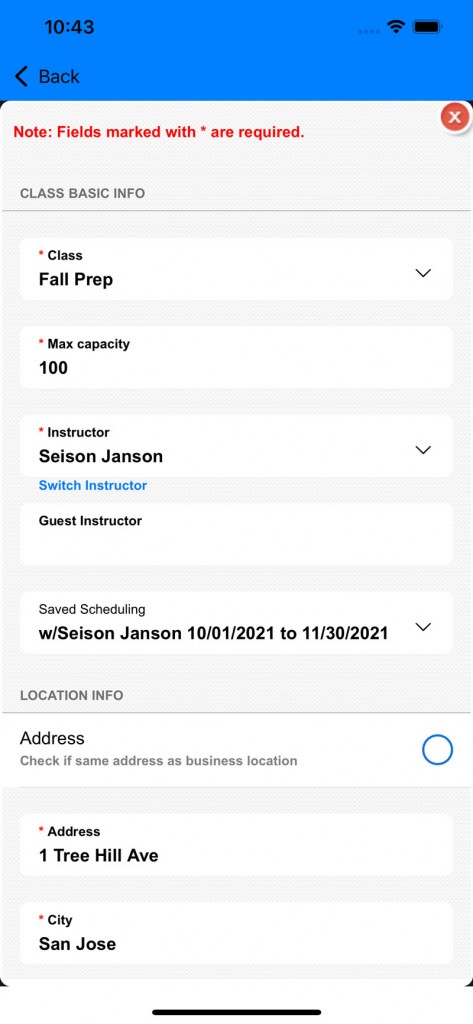
6.) Add in Schedule for class and instructor:
Add Schedule
Add Schedule:
1.) Go to your Dashboard and click on "Class Schedule":
2.) Click the "Add" icon:
3.) Add in the schedule info:
Editing a schedule
Editing a schedule:
1.) Go to your Dashboard and click on "Class Schedule":
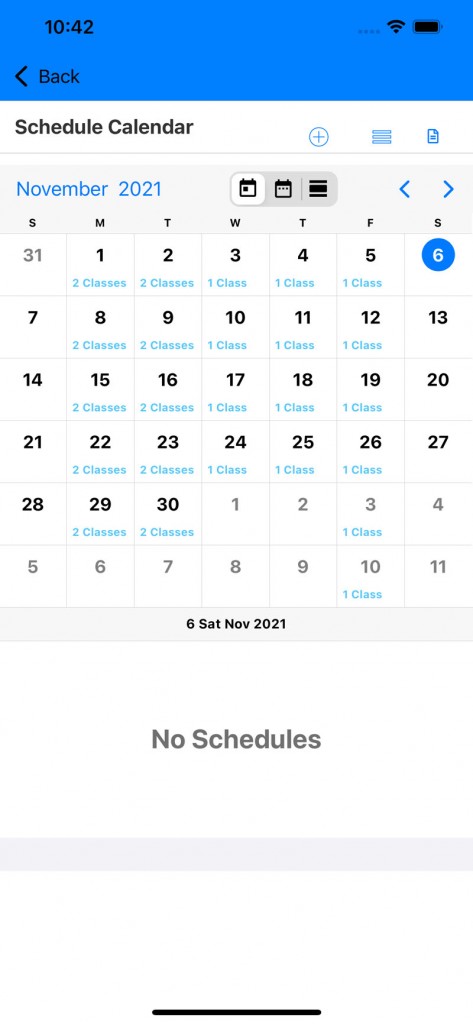
2.) Click on the "Schedules" icon:
3.) Select a date from your calendar:
4.) In the schedule list for that day, select your class:
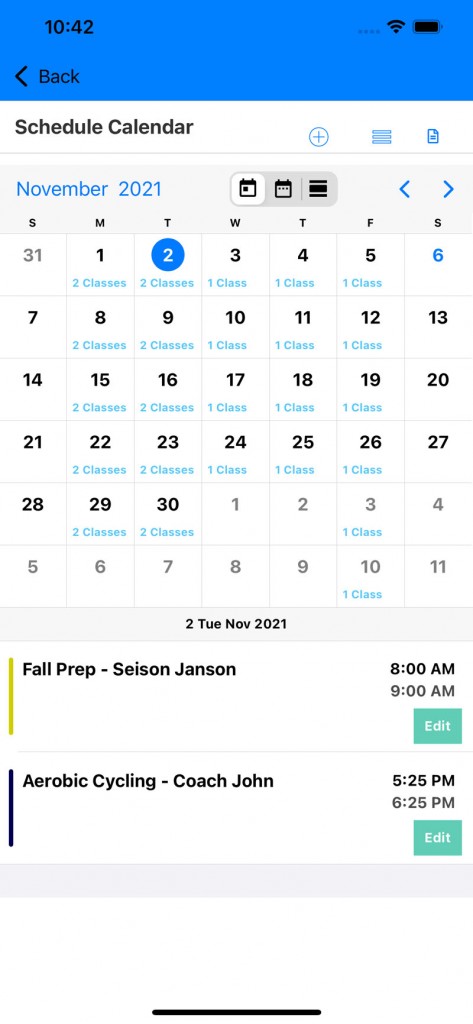
5.) Start editing your class schedule:
6.)Add in class location:
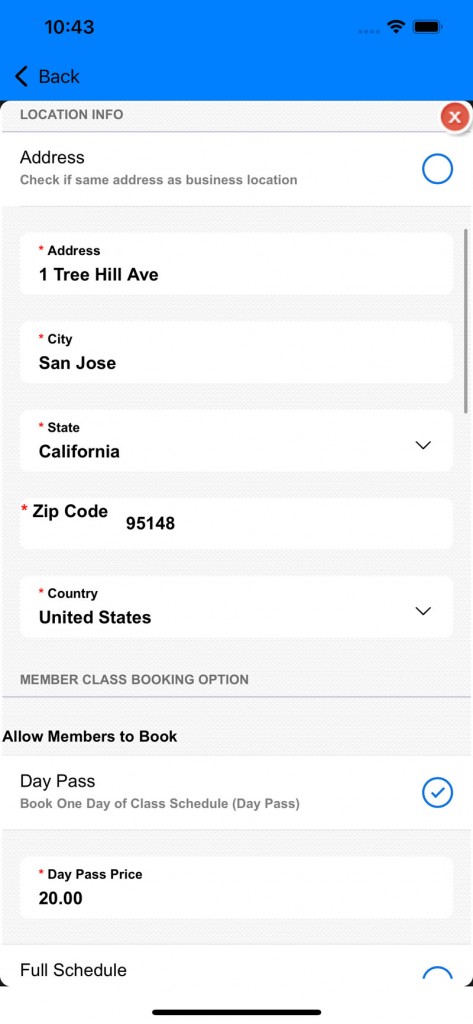
7.)Scroll to the Booking option:
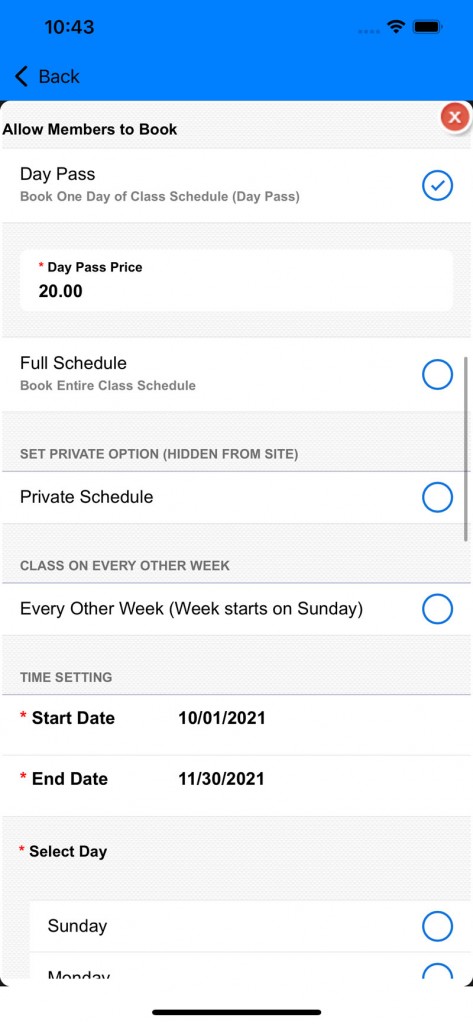
There are two two of bookings. One is the day pass booking and the other is a full schedule booking. A full scheduling booking includes the booking of all the days within that schedule.
You can have it so that a member must book the individual day of the full schedule prior attending the class.
8.) Scroll to "Blackout Dates"
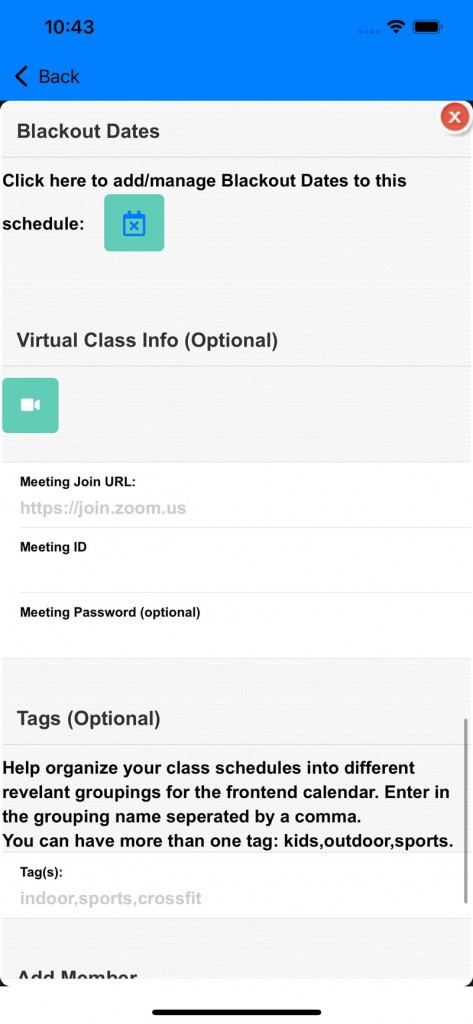
a.) Add blackdates for the schedule. These are dates that there are no classes available for this schedule or the instructor is absent for that day (vacation, sick leave, or holiday).
b.) Virtual class option is there if you wish to display the virtual class information to the member enrolled into this class.
9.) Scroll down to Tags.

a.) You can add different tags to this schedule. With tags you can group the different types of schedules (ie Kids or Adults).
b.) Add members option. Click on this to add current members to this schedule.
Membership Management
GagaClass - Membership
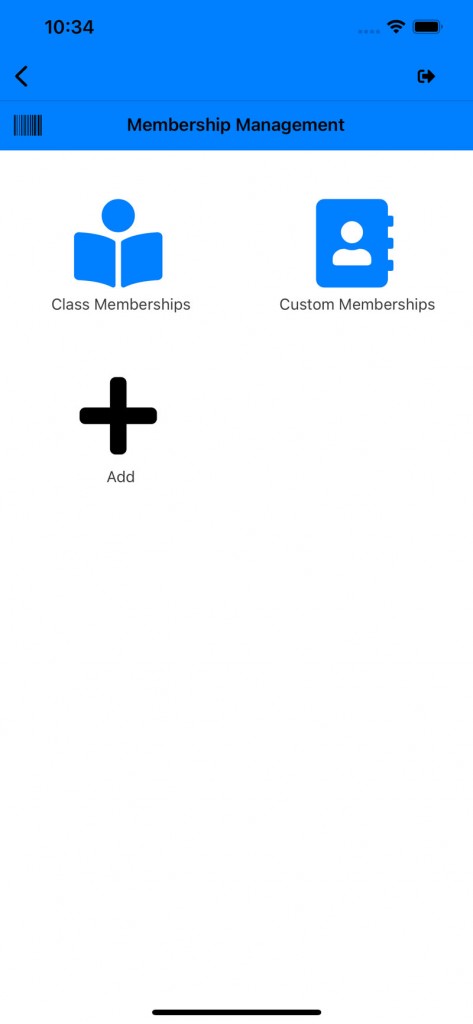
1.) Go to your Dashboard and click on "Membership Management":
2.) Click on the "Add" icon:
3.) Click on "Advanced Membership" Tab:
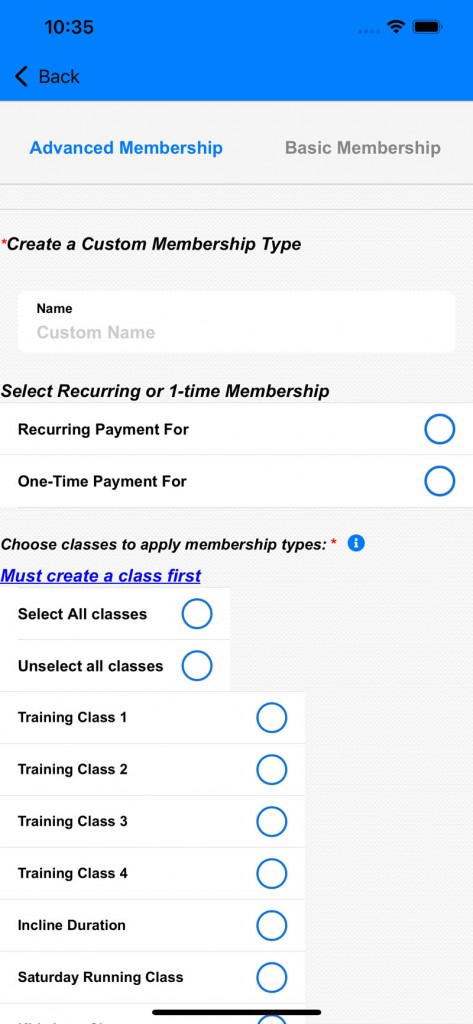
a.) There are ways you can set when payments are collected and if it is recurring. If it is a monthly recurring payment for 1 year you can set it so that it is charged for 30 days for 12 times.
b.) If the membership is a class package it can be created here by selecting more than one class. When selecting more than one classes you will see the class package options:
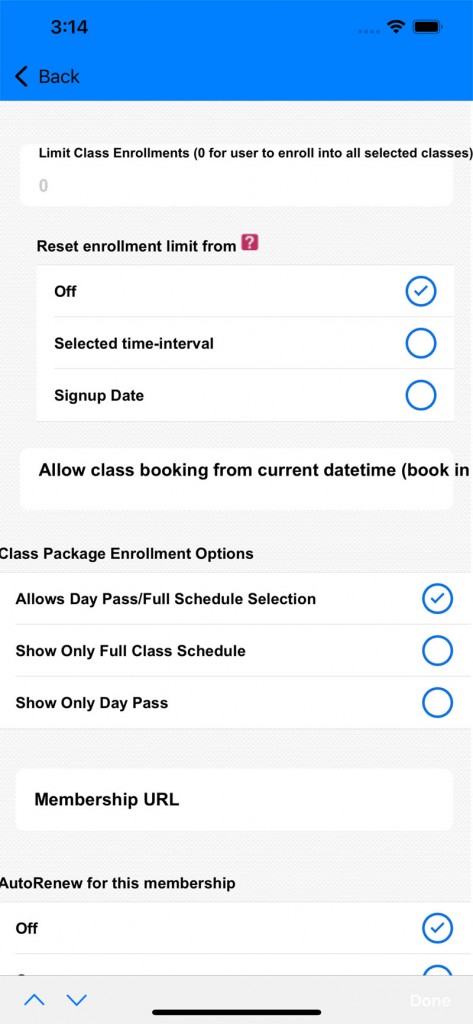
Class Package Options
a.) "Limit Class Enrollments" option applies to each member. This is the number max that allows them to enroll or book a class. Think of it as credits.
b.) "Reset enrollment limit" option. The limited enrollment for the classes can be reset. You can select for it to be reset each week.
For example you can have a class package of 2 credits that is reset each week. So members can only enroll into any two classes in the class package each week.
c.) "Class Package Enrollment Options" is for how the classes are enrolled. Each class schedule may have two options (day pass and full schedule enrollment). Here you can limit what is available for the class package.
4.) Scroll down to "Membership Price":
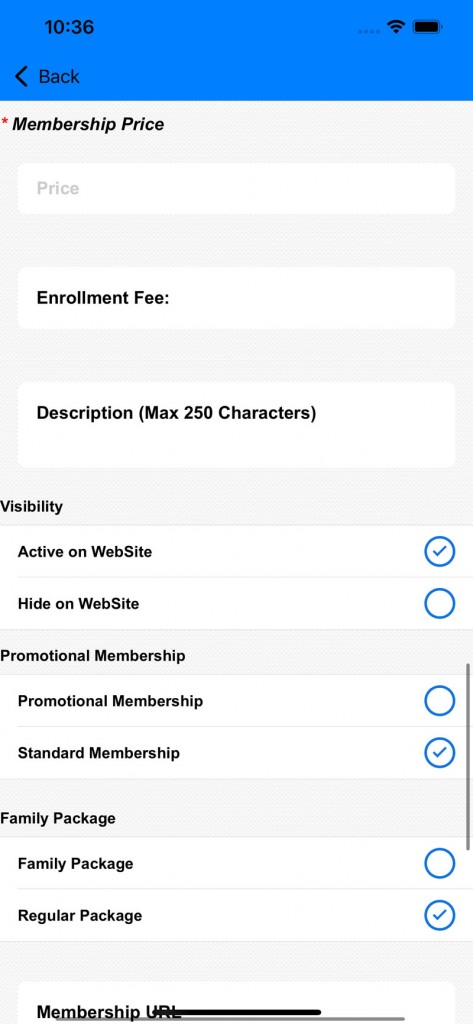
a.) Membership price is the price of this membership. If this membership has a number of classes assigned to it then the price is for the class package.
b.) Visibility is set to hide or show this membership on the signup page.
c.) Family Package option is set if this membership has the ability to add other members to it.
5.) Scroll down to "Membership URL" :
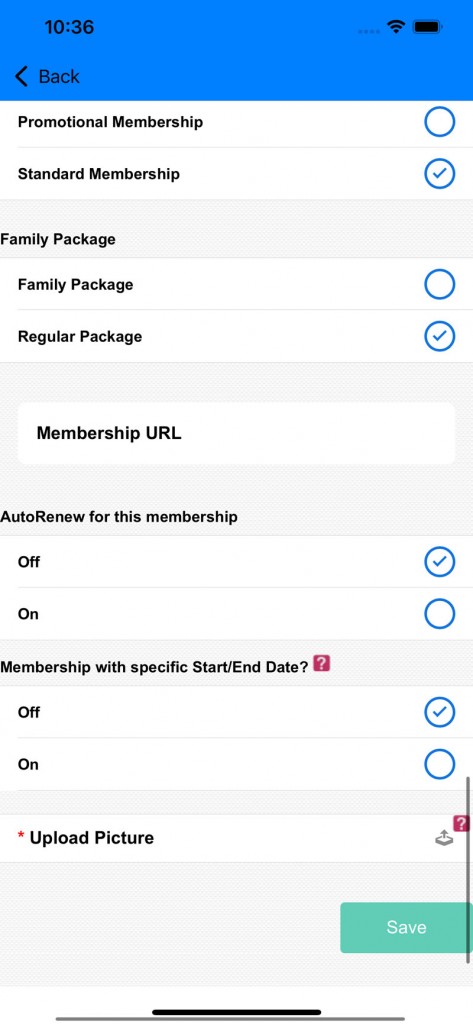
a.) Membership URL: this is updated when page is embedded into your site.
b.) AutoRenew: this has precedence over the global auto-renew. When the autorenew is set the membership is added to the member automatically when their current one ends.
c.) Membership start/end date: This is for membership that occurs in a specific timeframe.
Members
There are a lot of features for managing a member. These two are instructions on how to get started with member management:Adding a member
Adding a Member
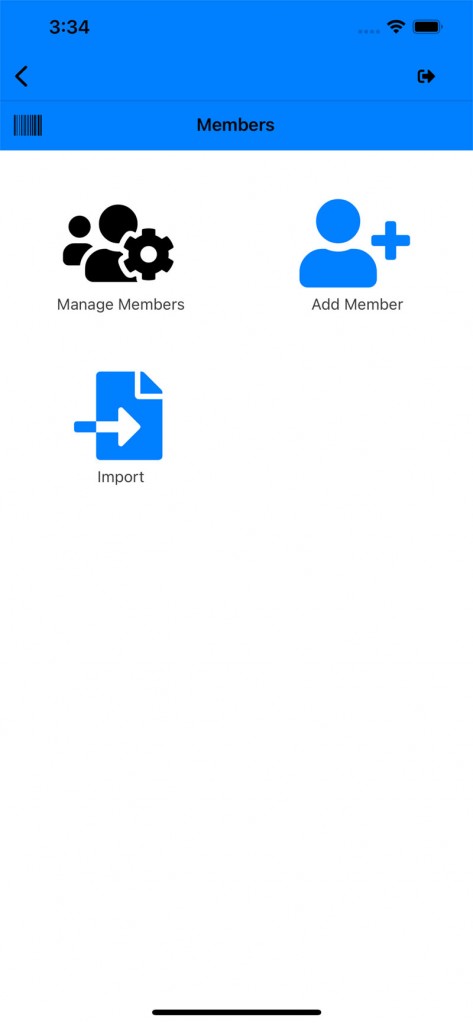
1.) Go to your Dashboard and click on "Members":
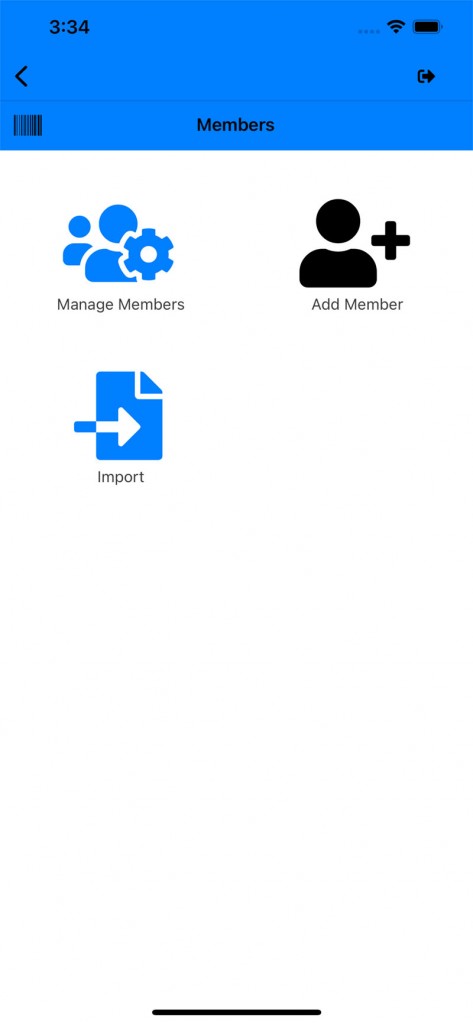
2.) Click on the "Add Member" icon:
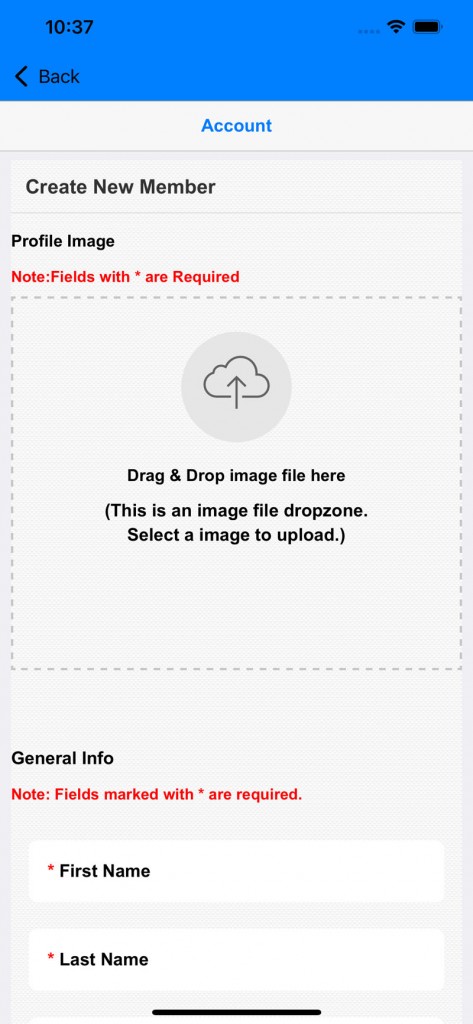
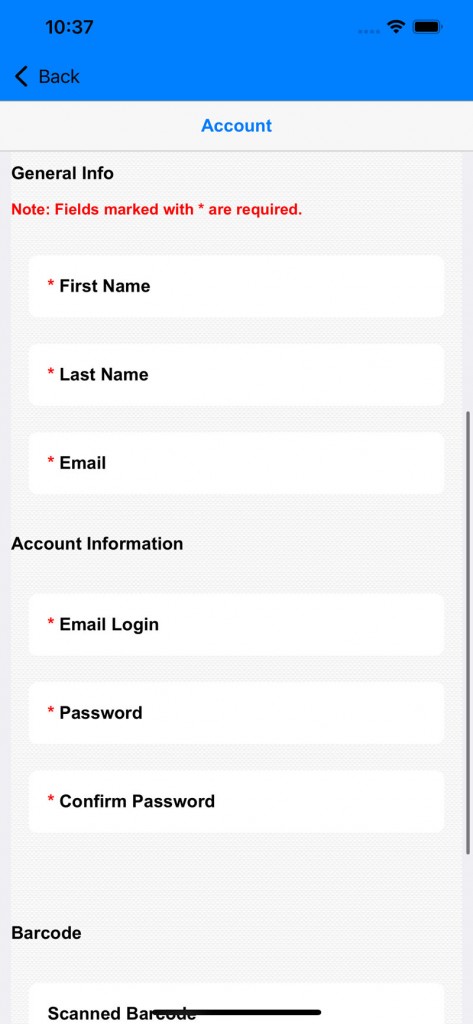
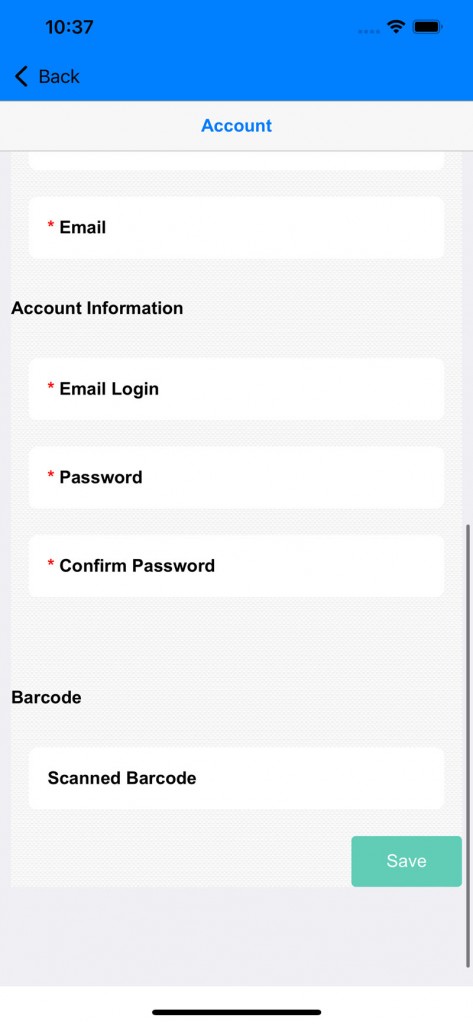
3.) Fill out the member info
4.) Add in the member's email and a password:
5.) Save it
B.) Managing Member
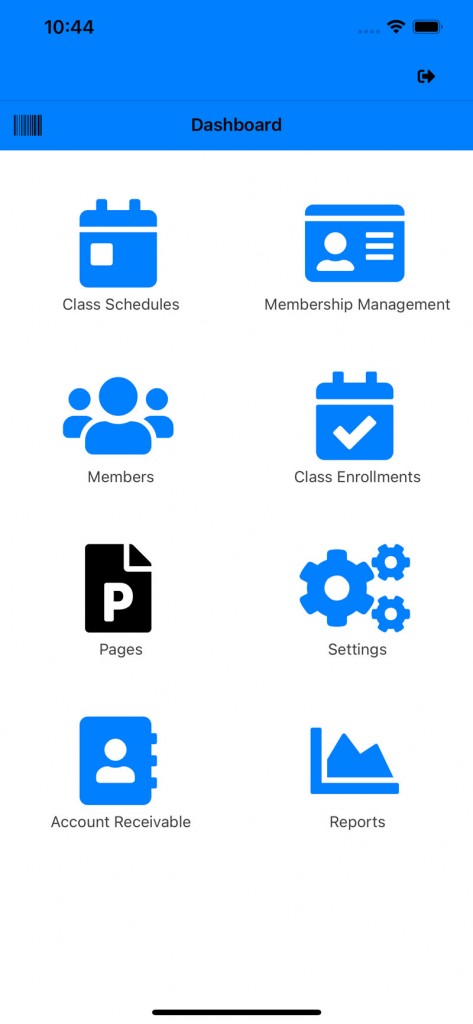
1.) Go to dashboard and click on "Members"
2.) Click on "Manage Members"
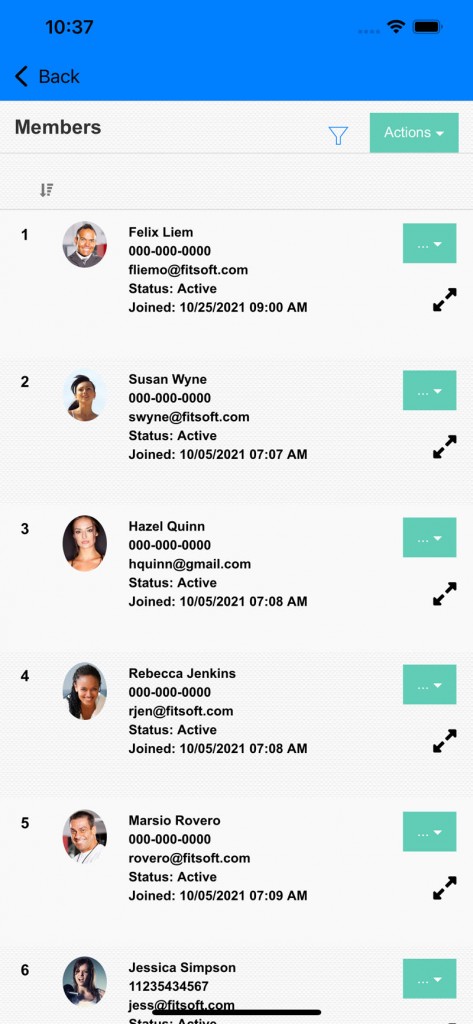
3.) The list of members page opens:
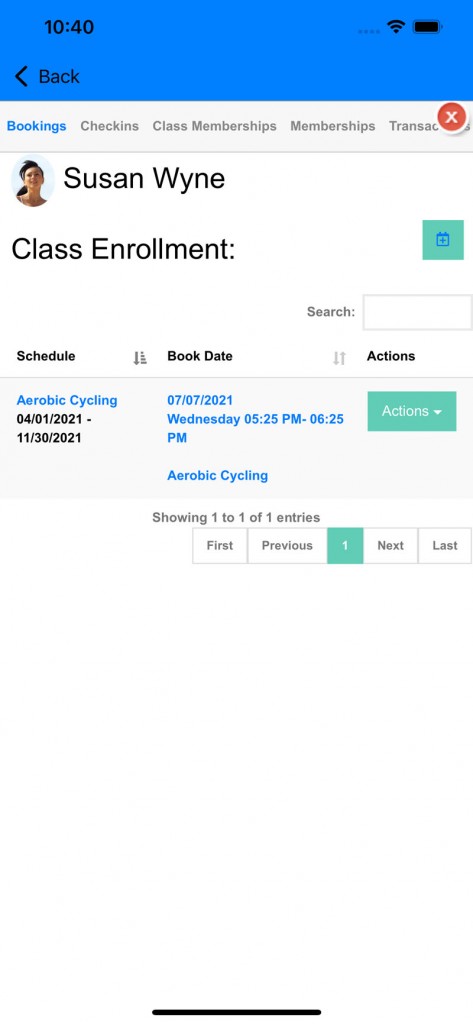
4.) Click on a member to view member's membership and enrollment info:
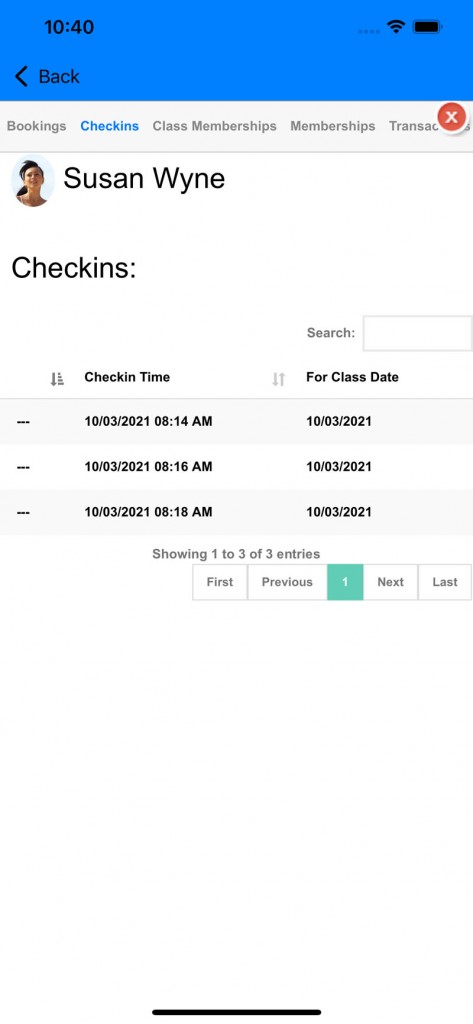
5.) Checkin Tab: View the checkins of a member
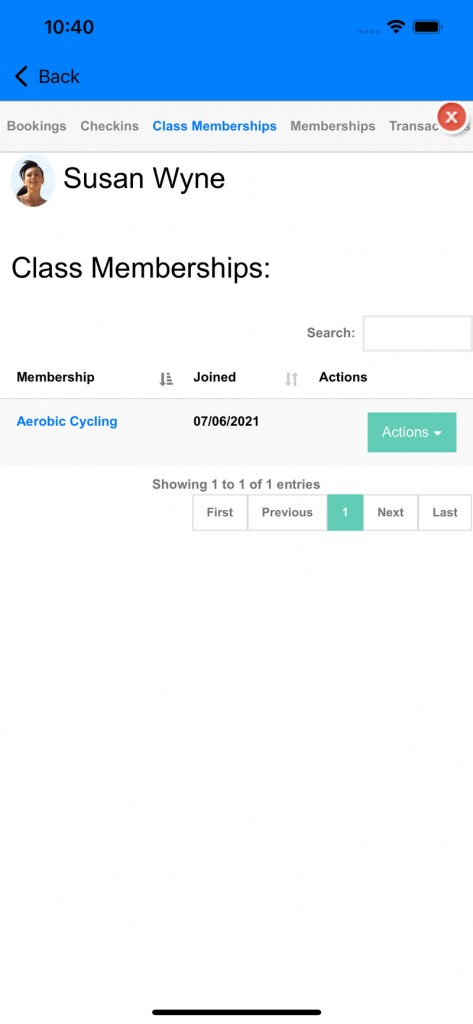
6.) Class Membership Tab: View the class membership (single class) associate with the member.
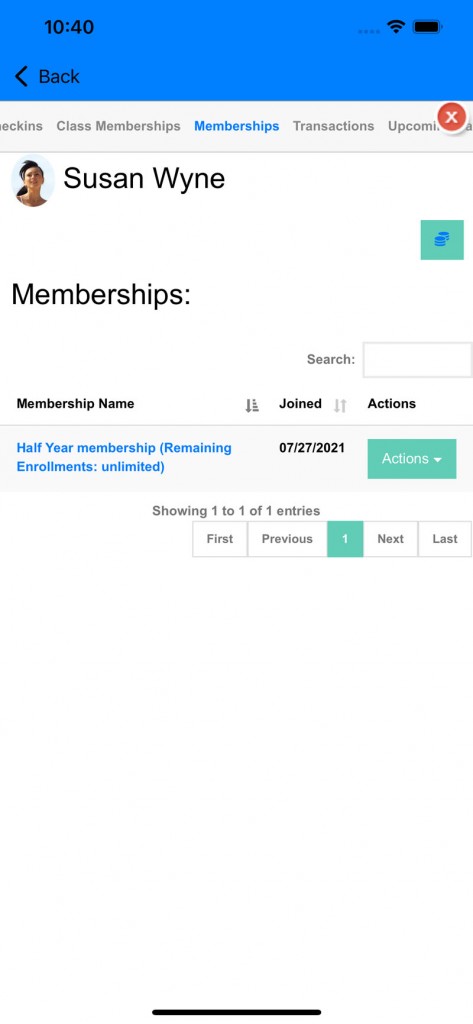
7.) Membership Tab: View the advanced and custom memberships associated with the member.
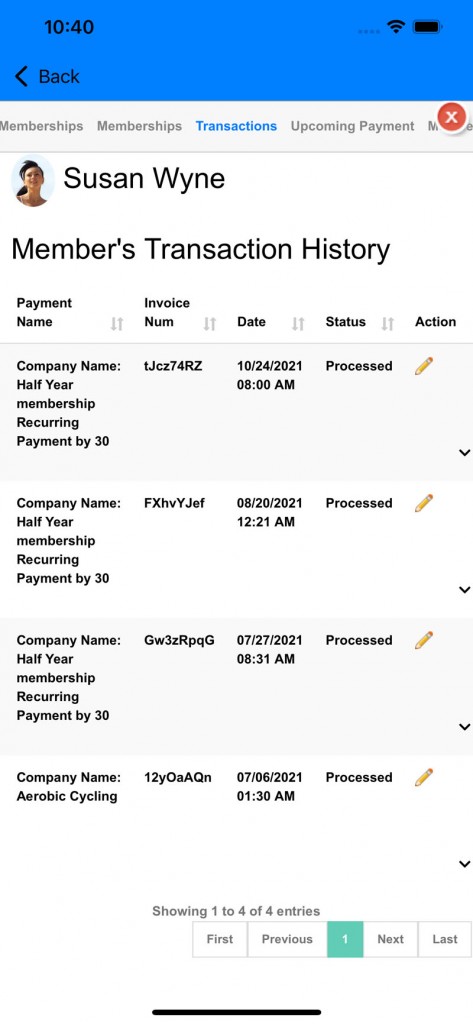
8.) Transactions Tab: View the transaction processed of member
9.) Upcoming Payment Tab: View the upcoming payment pending. You can manage it also here by clicking on the "Amount" or "Due Date".
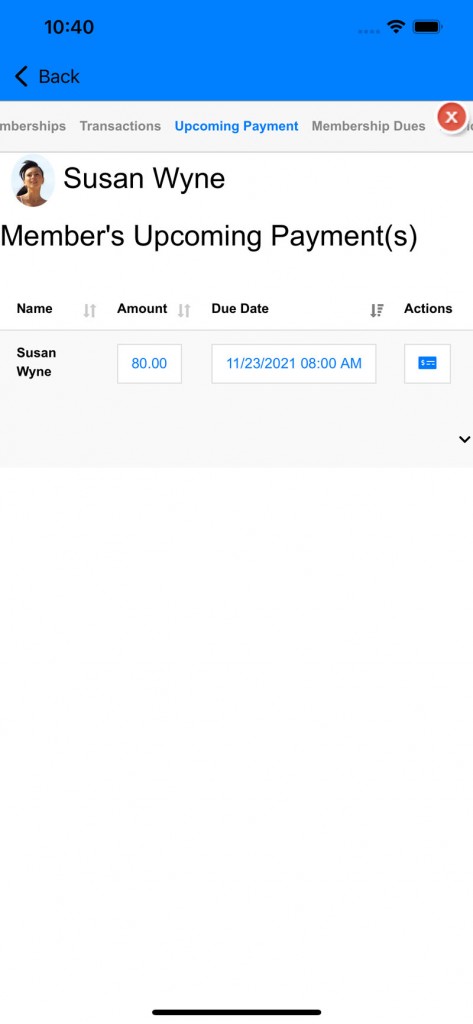
Click on the "Amount" or "Due Date" to edit the upcoming payment.
There are two options (General and Advanced Setting)
a.) General setting option. Update a single upcoming payment or all subsequent payments.
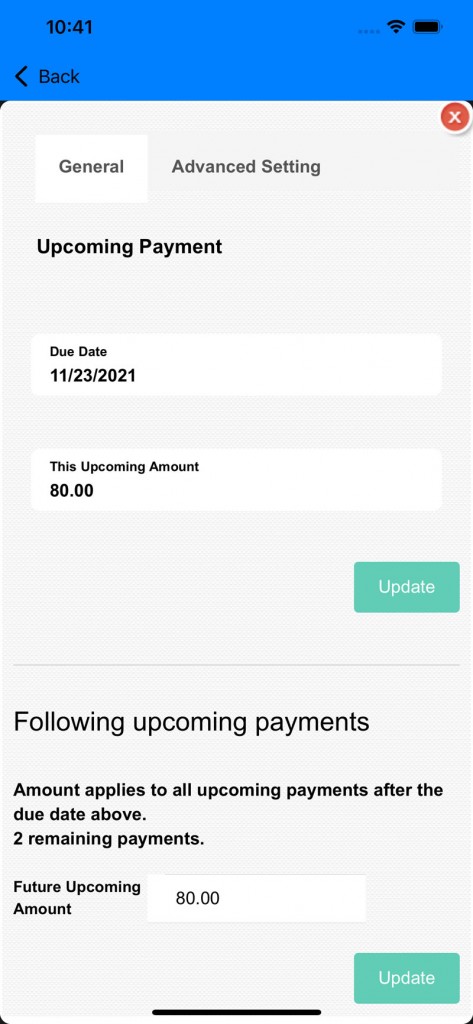
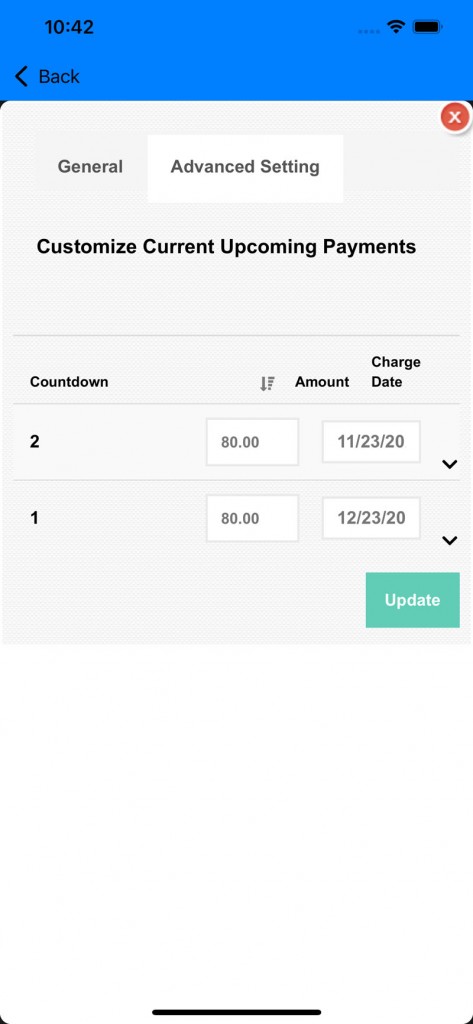
b.) Advanced Setting option. Update remaining upcoming payment of the membership term.
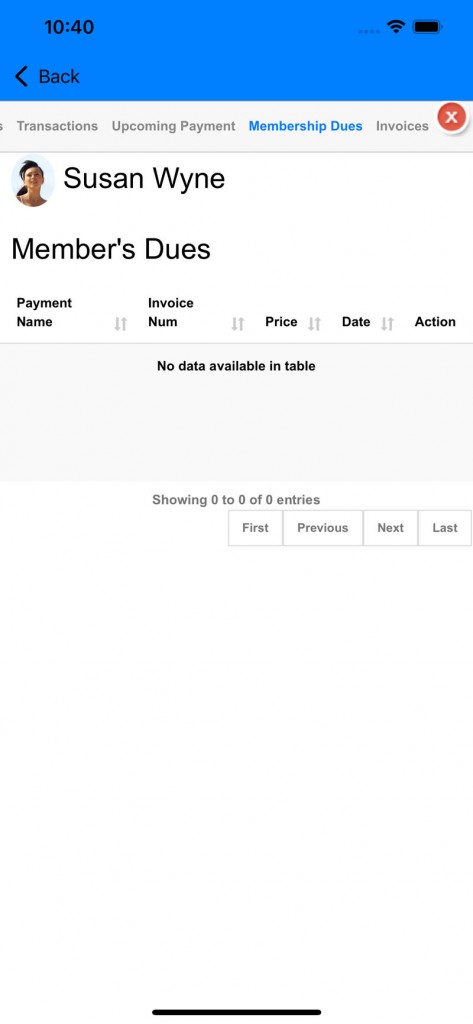
10.) Membership Dues: View past dues of member
11.) Invoice Tab: View the created invoice of member
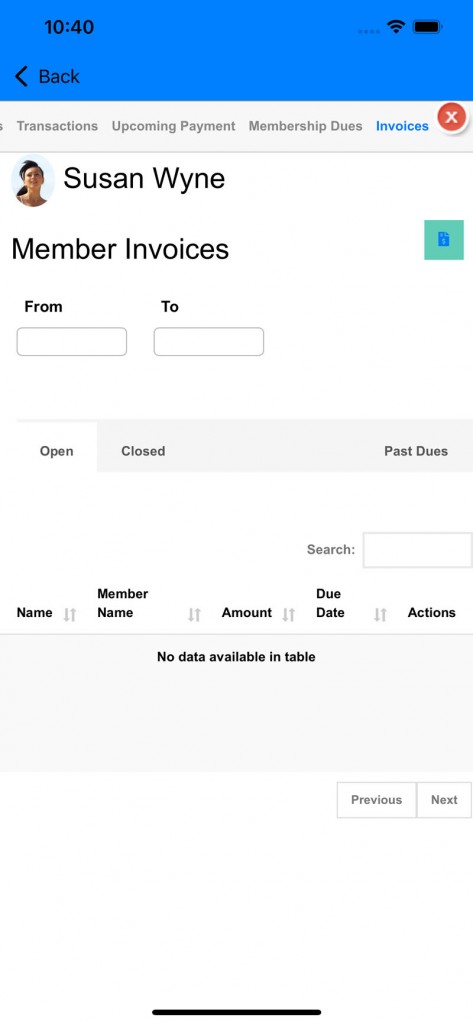
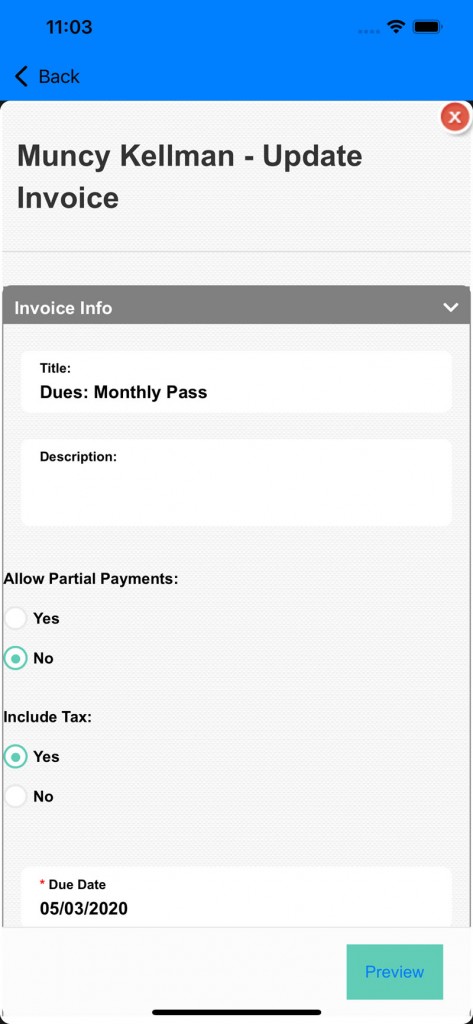
12.) Click on the invoice button next to "Member Invoice" to create a new invoice for member
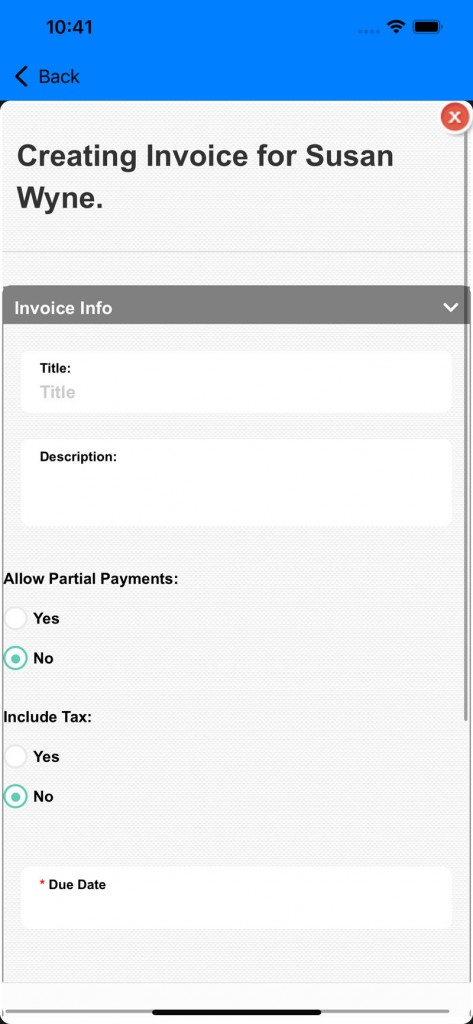
a.) Partial payment: Allow member to pay for the partial invoice
b.) Tax: Add in tax for the invoice
c.) Due Date: This is when the invoice is due.
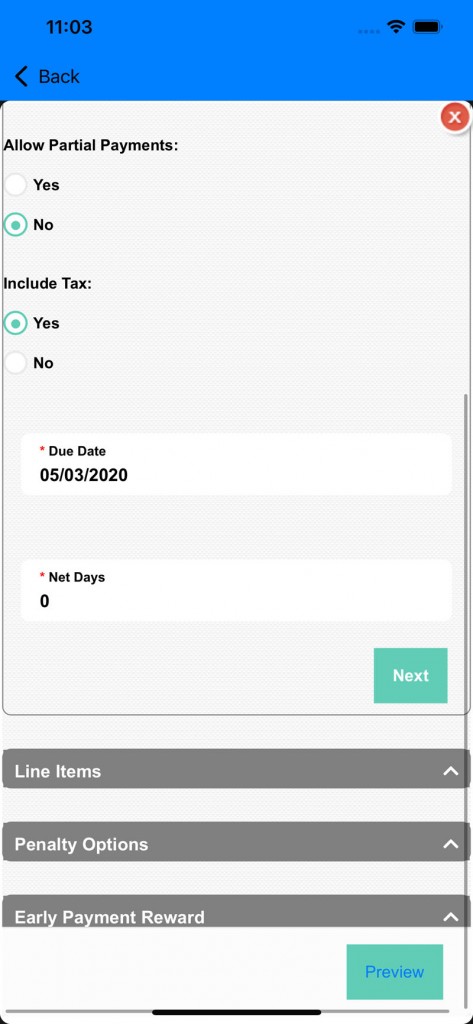
13.) Scroll down to other options
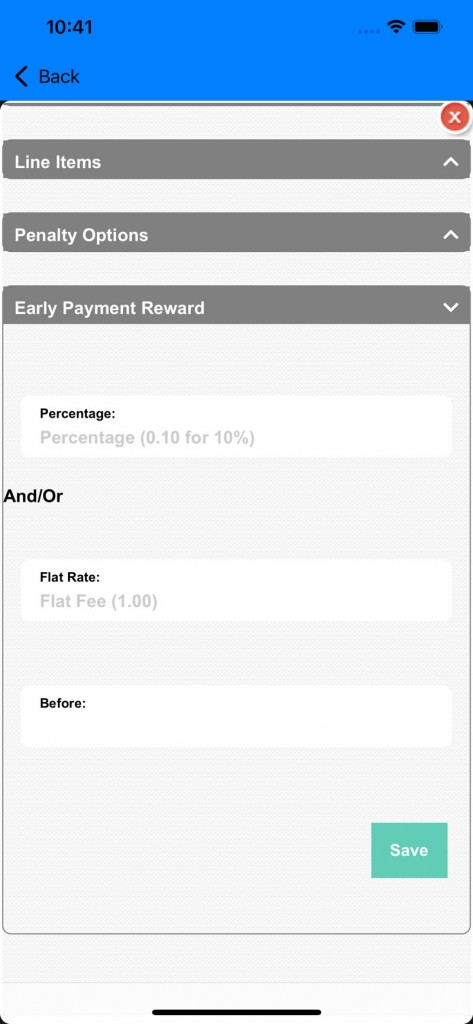
a.) Line Items: Add in line items for the invoice
b.) Penalty option: Add in penalty for late payment and when a penalty is applied.
c.) Reward option: Add in reward for early payment and pay sooner to receive reward discount.
Managing Member
GagaClass - Members
Managing Member
1.) Go to dashboard and click on "Members"
2.) Click on "Manage Members"
3.) The list of members page opens:
4.) Click on a member to view member's membership and enrollment info:
5.) Checkin Tab: View the checkins of a member
6.) Class Membership Tab: View the class membership (single class) associate with the member.
7.) Membership Tab: View the advanced and custom memberships associated with the member.
8.) Transactions Tab: View the transaction processed of member
9.) Upcoming Payment Tab: View the upcoming payment pending. You can manage it also here by clicking on the "Amount" or "Due Date".
Click on the "Amount" or "Due Date" to edit the upcoming payment.
There are two options (General and Advanced Setting)
a.) General setting option. Update a single upcoming payment or all subsequent payments.
b.) Advanced Setting option. Update remaining upcoming payment of the membership term.
10.) Membership Dues: View past dues of member
11.) Invoice Tab: View the created invoice of member
12.) Click on the invoice button next to "Member Invoice" to create a new invoice for member
a.) Partial payment: Allow member to pay for the partial invoice
b.) Tax: Add in tax for the invoice
c.) Due Date: This is when the invoice is due.
13.) Scroll down to other options
a.) Line Items: Add in line items for the invoice
b.) Penalty option: Add in penalty for late payment and when a penalty is applied.
c.) Reward option: Add in reward for early payment and pay sooner to receive reward discount.
Pages
GagaClass - Pages
1.) Go to your Dashboard and click on "Pages":
2.) A list of pages will open.
Click on the second icon to share the page.
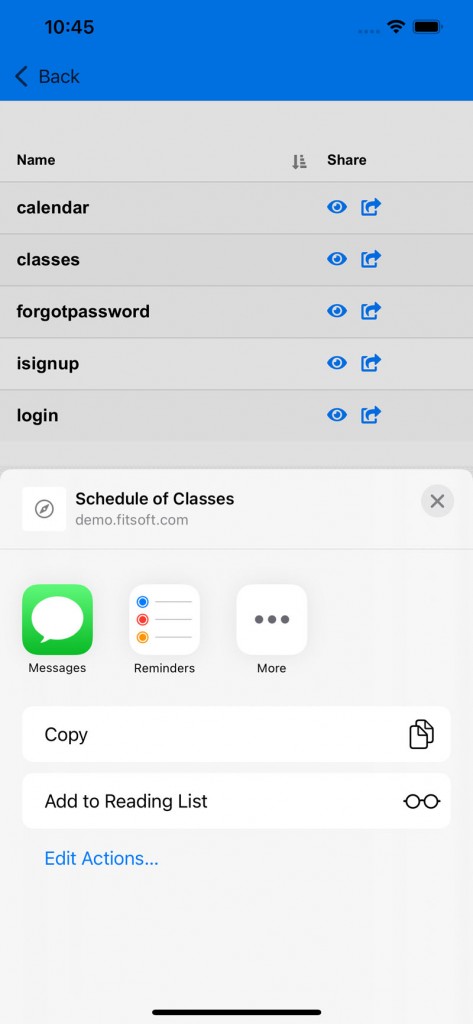
Calendar: a calendar view of your classes
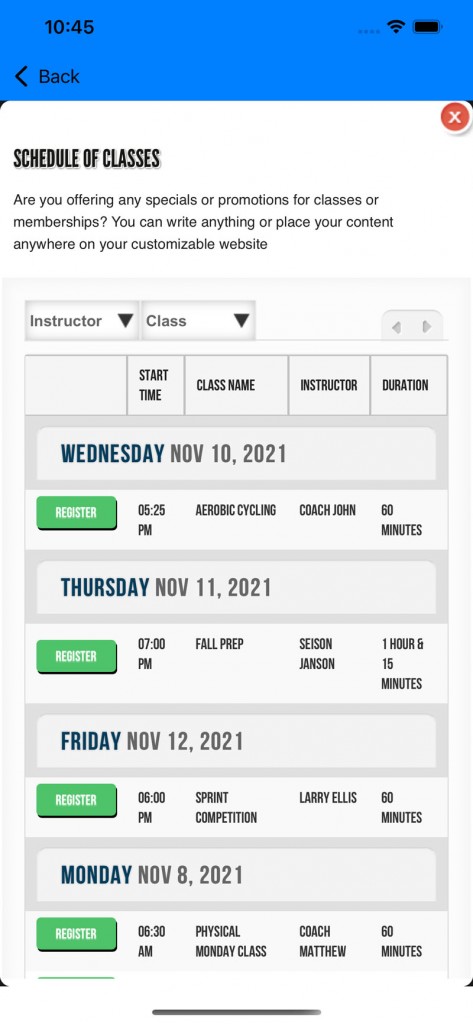
Classes: Schedule of classes
Forgotpassword: Forget password page for your member
isignup: Signup page for your members
Login: Login page for member to access member's dashboard
3.) Click on the first icon to view the page:
Account Receivable
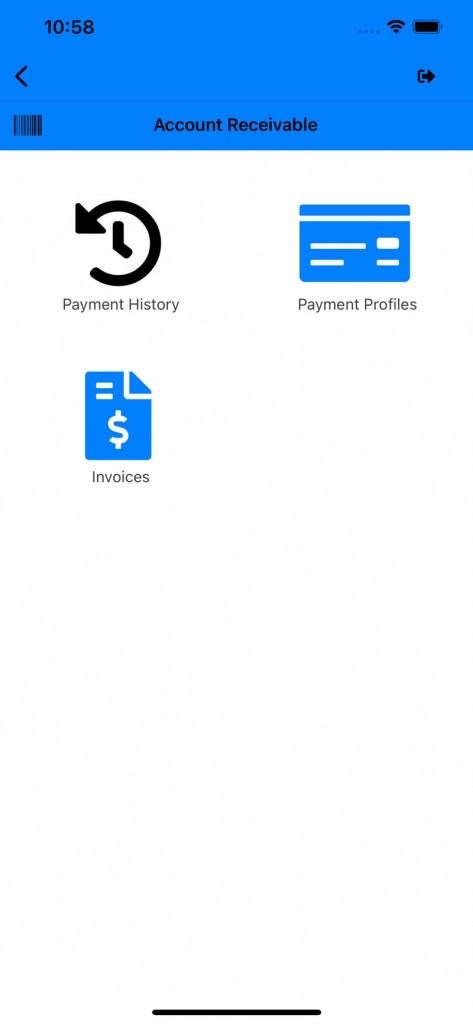
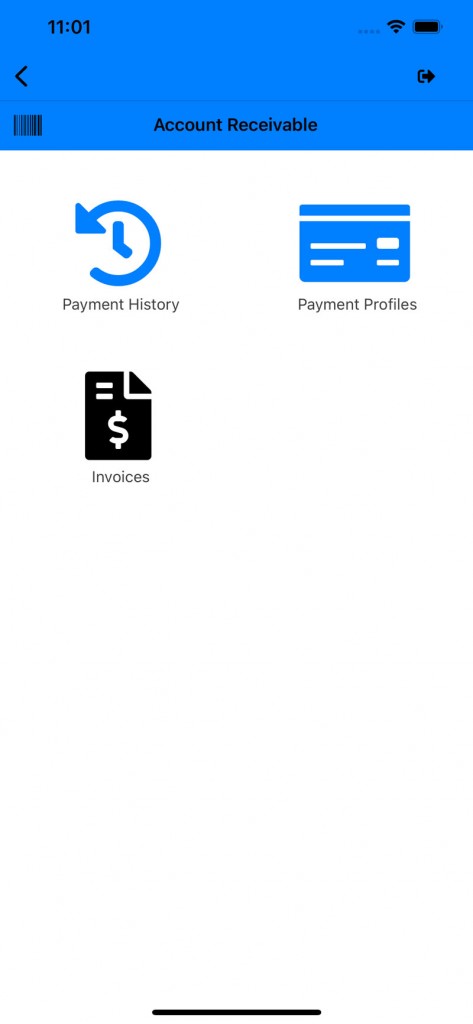
Account receivable are separated into three parts: payment history consisting of all payments that are processed, payment profiles that are the a collection of rules set by your membership for payment processing for each member, and lastly, invoicing which create by admin to collect itemized payments.Payment History
GagaClass - Account Receivable
1.) Go to your Dashboard and click on "Account Receivable":
2.) Click on "Payment History"
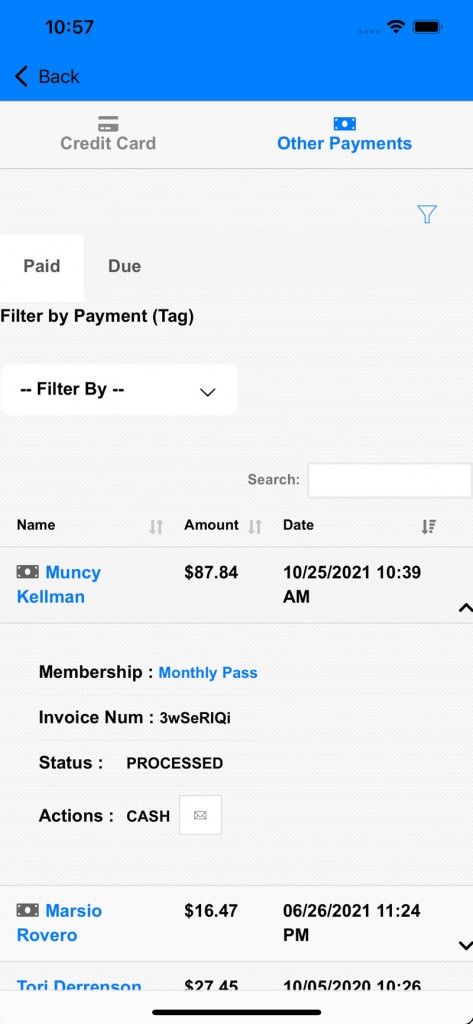
3.) There are two tabs consisting of "Credit Card" and "Other Payments"
Within each tab there is a subsection for "Success/Paid" and "Declined/Due".
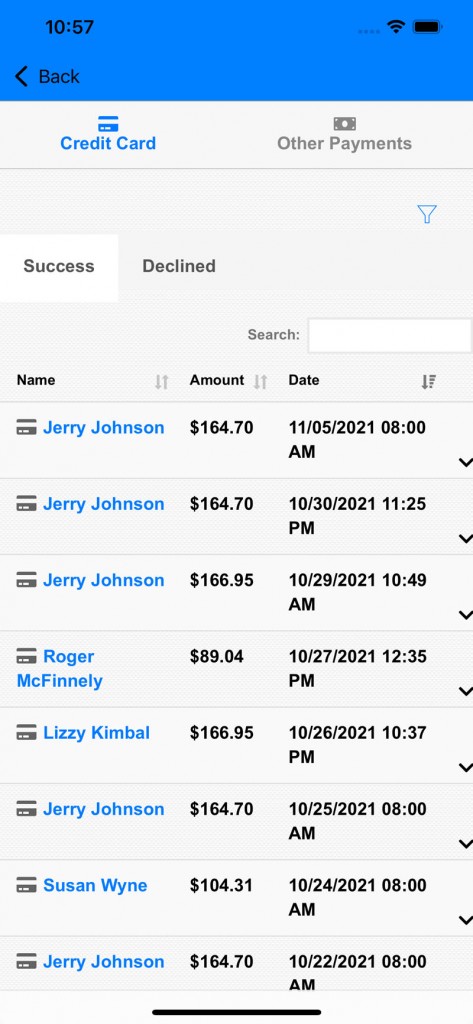
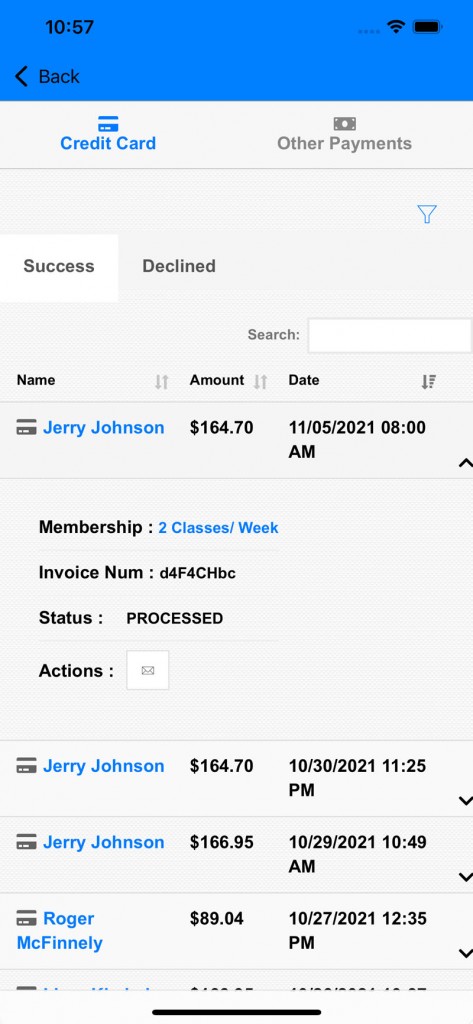
4.) Expanding the line item, there's more information about the payment.
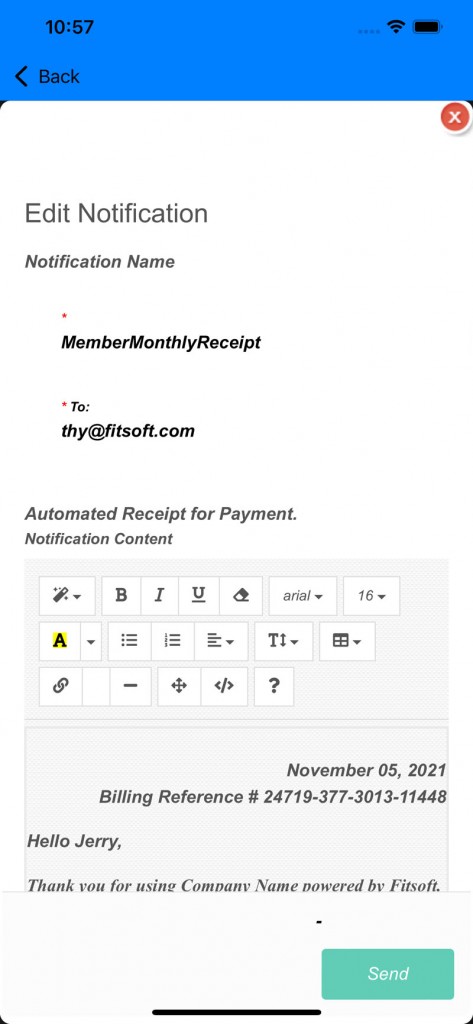
5.) Clicking on the mail icon, there is a feature where payment receipt can be sent and modified.
6.) Click on "Other Payments"
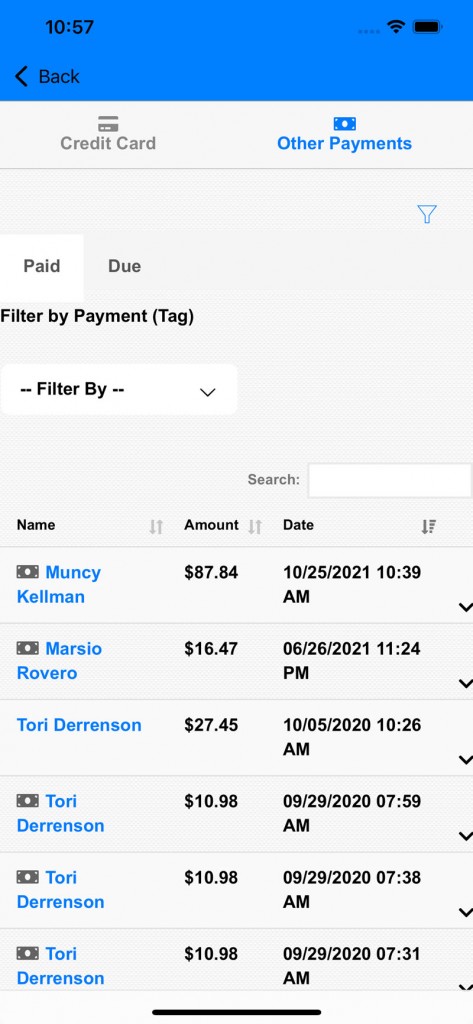
a.) Filter by custom payment tags feature is included in the "Other payments" section (in settings under the "Payments" tab you can add in your custom payment tag there.)
7.) Expand the payment to see more information.
8.) Go to the sub-setion "Due" to see past dues.
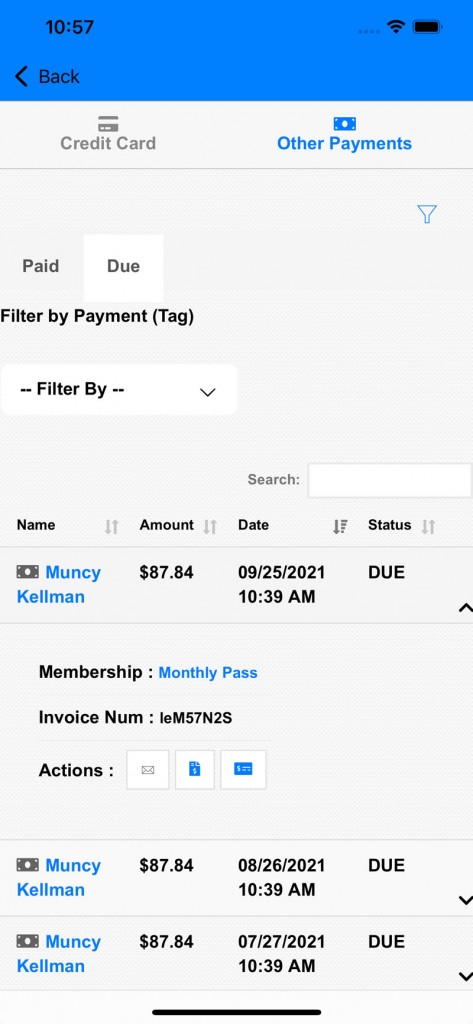
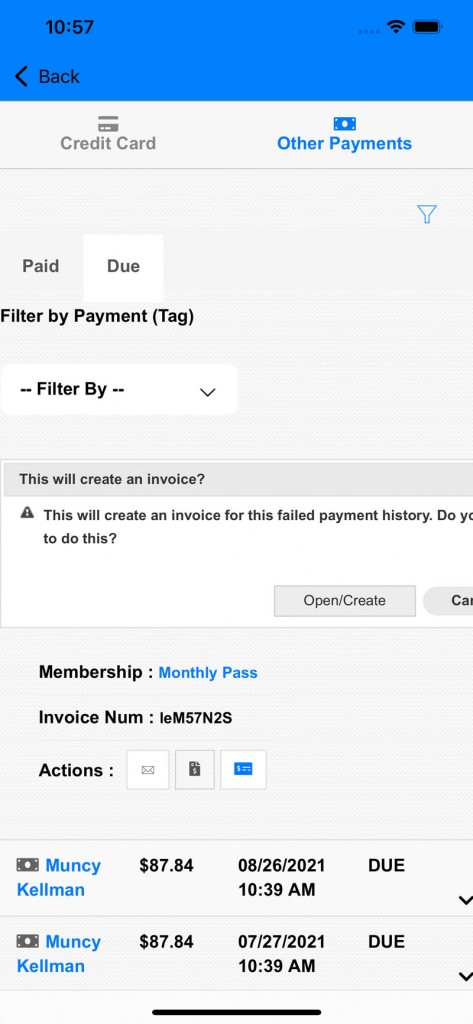
9.) Click on the third icon to create an invoice of past dues
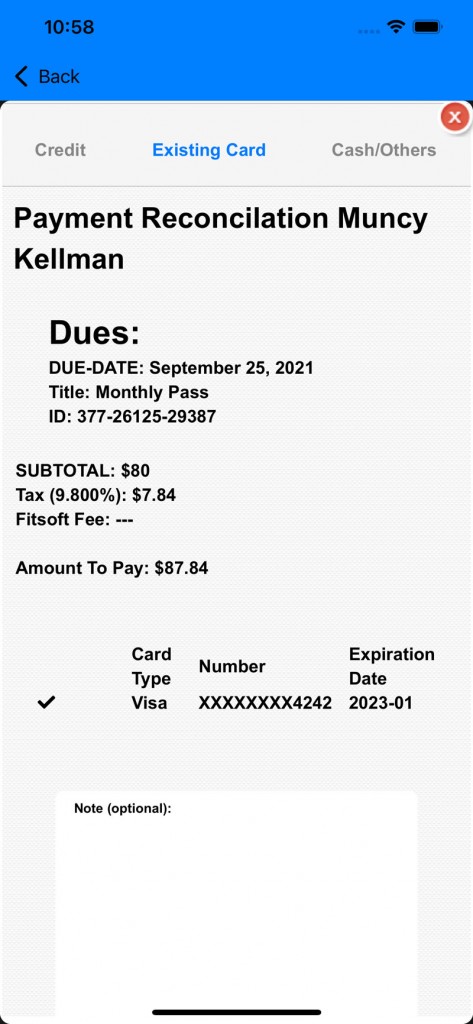
10.) Click on the second icon to Reconcile the past due:
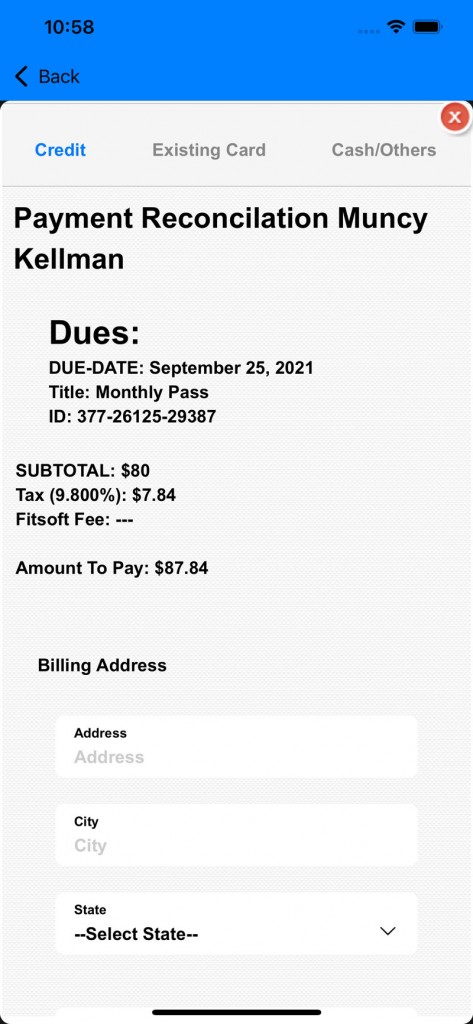
11.) Pay by "Existing Card"
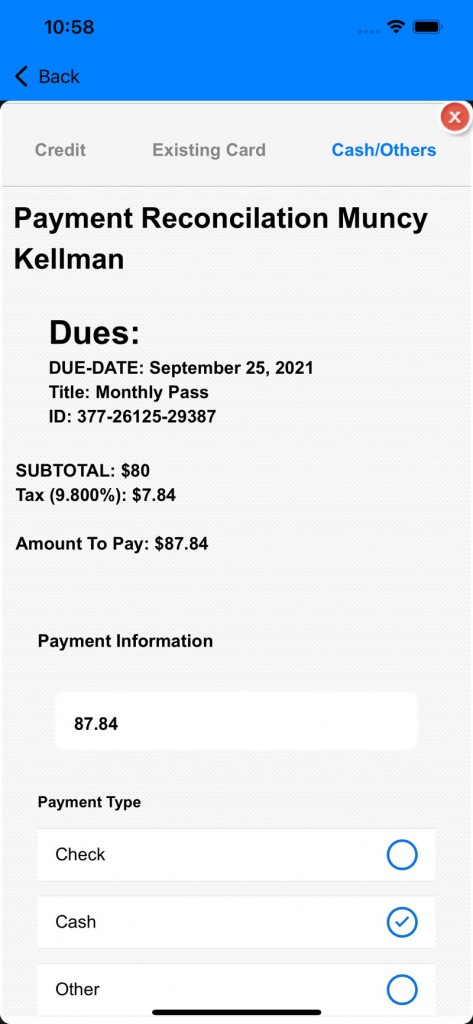
12.) Pay by "Cash/Others"
Payment Profiles
GagaClass - Payment Profiles
1.) Go to your Dashboard and click on "Account Receivable":
2.) Click on "Payment Profiles"

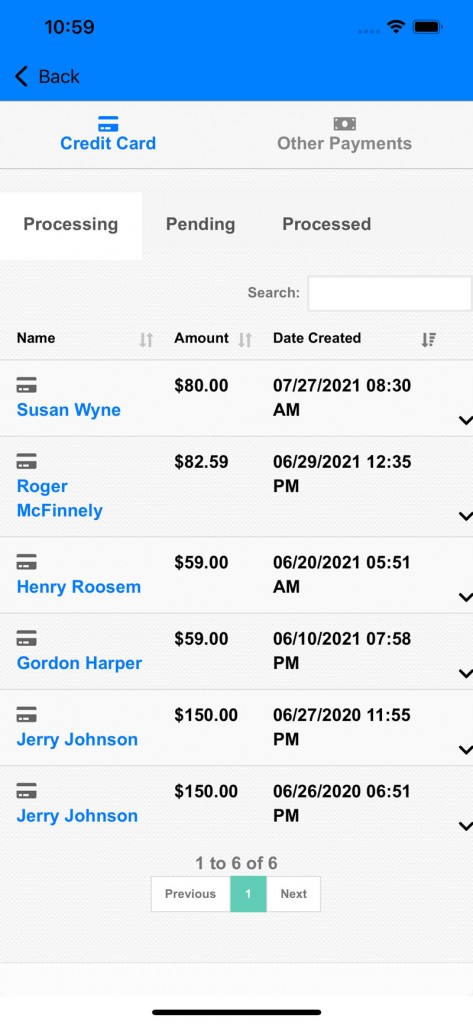
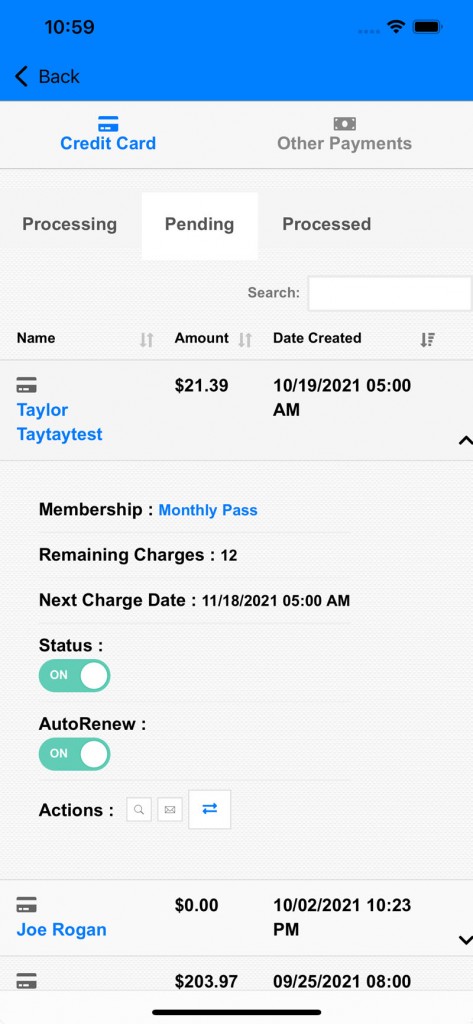
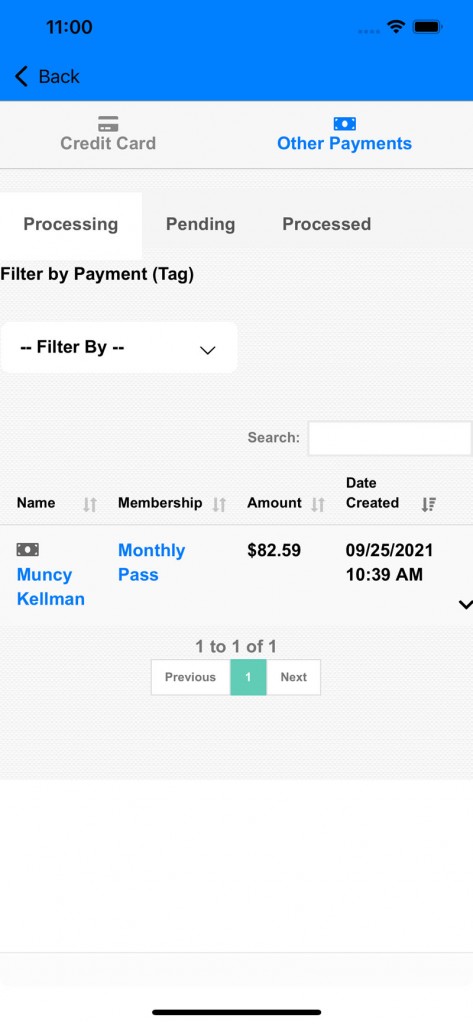
3.) There are 2 sections "Credit Cards" and "Other Payments"
Under Credit Cards there are three subsections:
Processing: Payment profiles that are still proceeding and the terms of the payment is not completed.
Pending: Payment Profiles that has not started yet will be under pending.
Processed: Payment Profiles that have completed it terms.
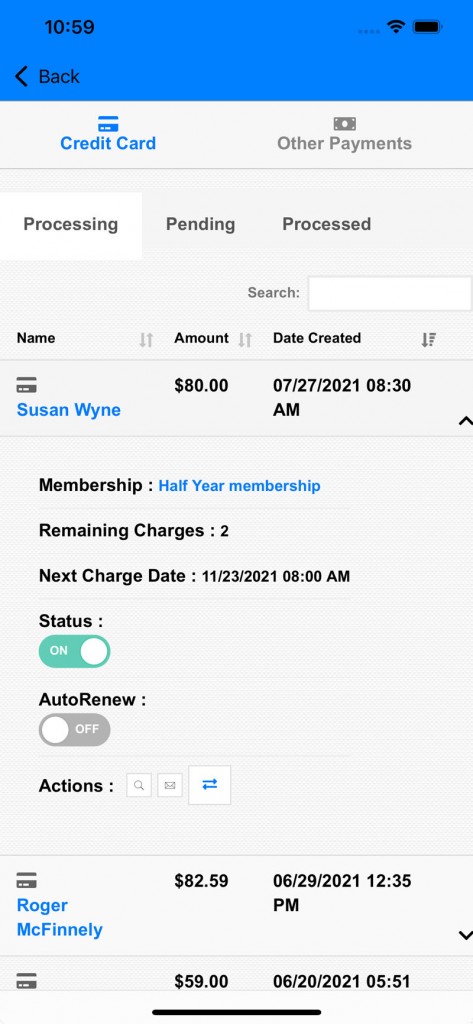
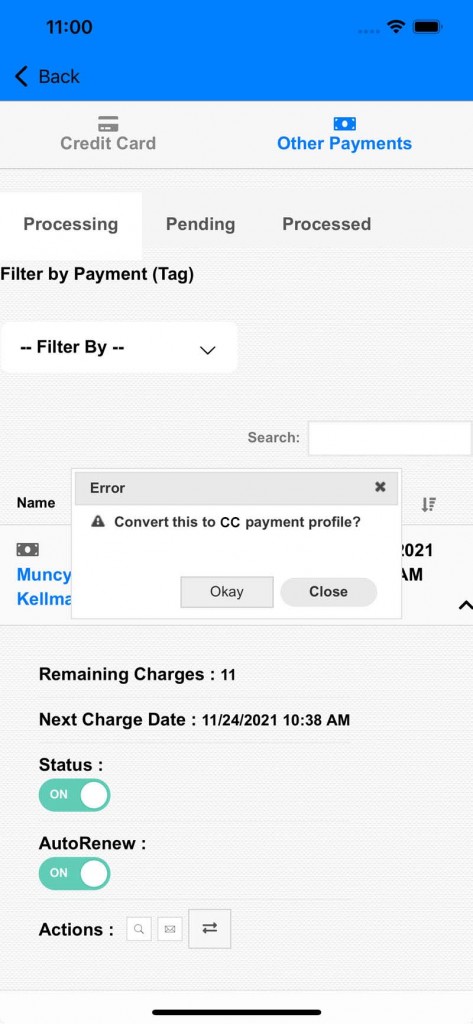
4.) For active and pending payments you can find more information about it the profile if you expand it.
Status: There are options to turn off payment profile by clicking on the status.
AutoRenew: Set the payment profile on AutoRenew or not.
Action Items: More Details, Mail, and Payment Type Conversion.
5.) Click on "Pending' to see all payment profiles that has not started:

6.) Expand the payment profile to see more information about it
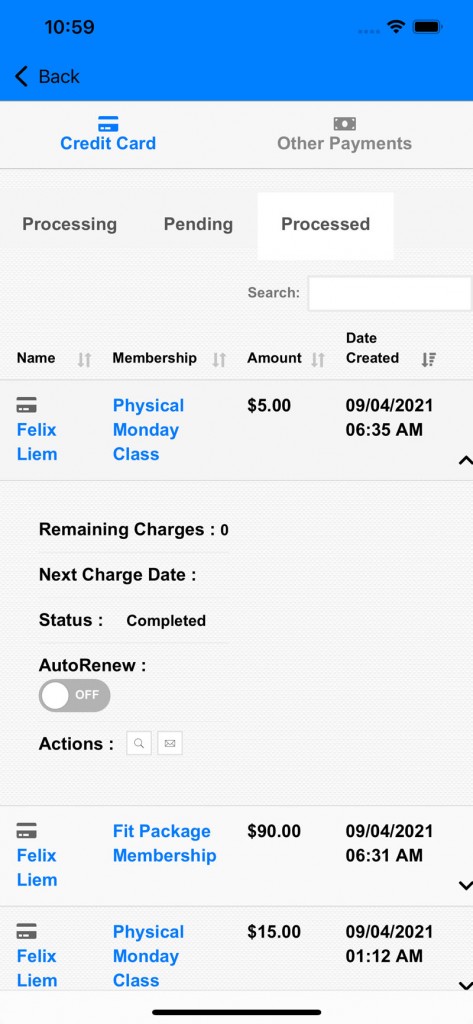
7.) Click on "Processed" to find the completed payment profiles.
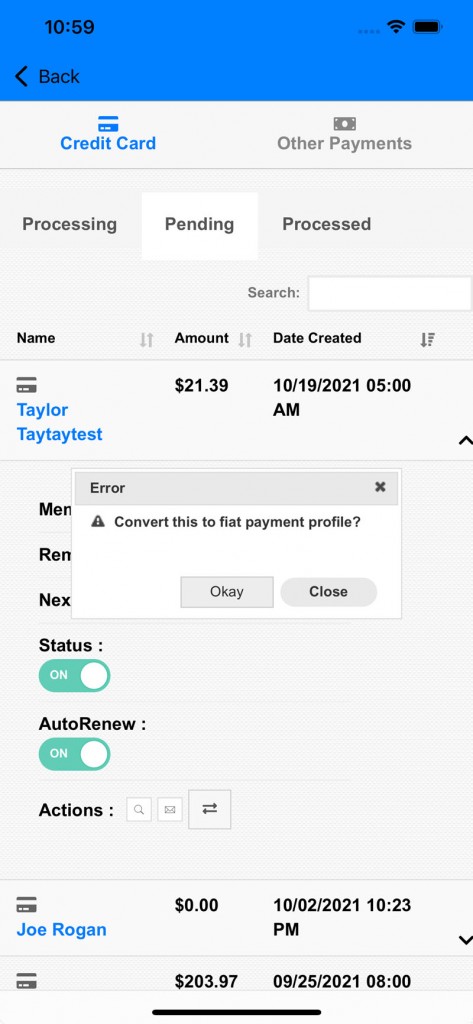
8.) In "Processing" and "Pending" tab of "Credit Card" there is an option to convert the credit card to cash payment. Click on the opposing arrows icon to begin the conversion (third icon).
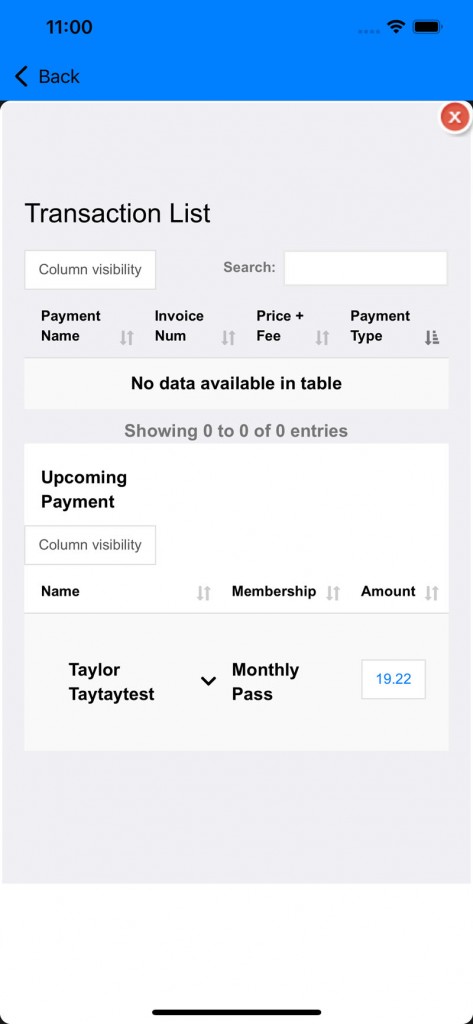
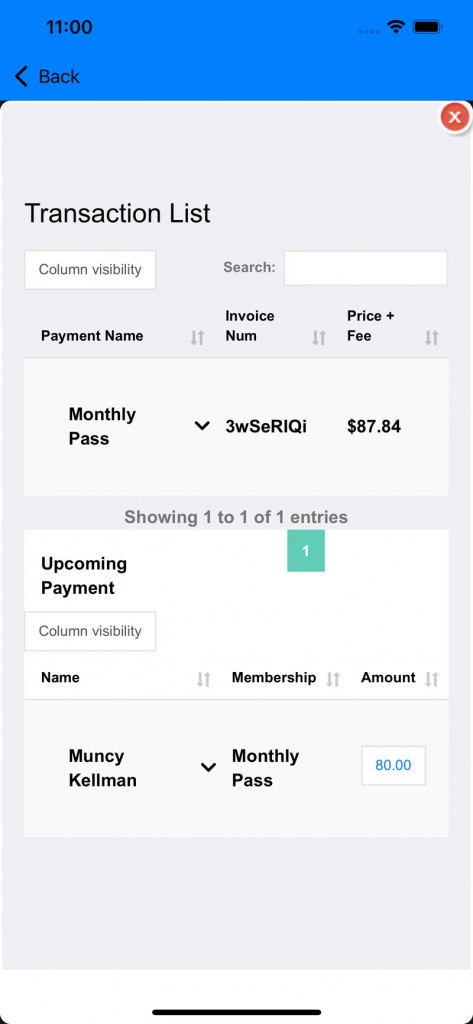
9.) Click on the first icon, magnify glass icon, to see the transactions of the payment profile.
10.) Go to "Other Payments"
11.) Like Credit Card section, there are action items for each payment profiles (transactions list of the payment profile, mailing payment info, and converting payment type).
Payment Profiles
GagaClass - Invoicing
1.) Go to your Dashboard and click on "Account Receivable"
2.) Click on "Invoice" icon:
3.) The invoice page will open three different phases of invoicing (Open, Closed, and Past Dues).
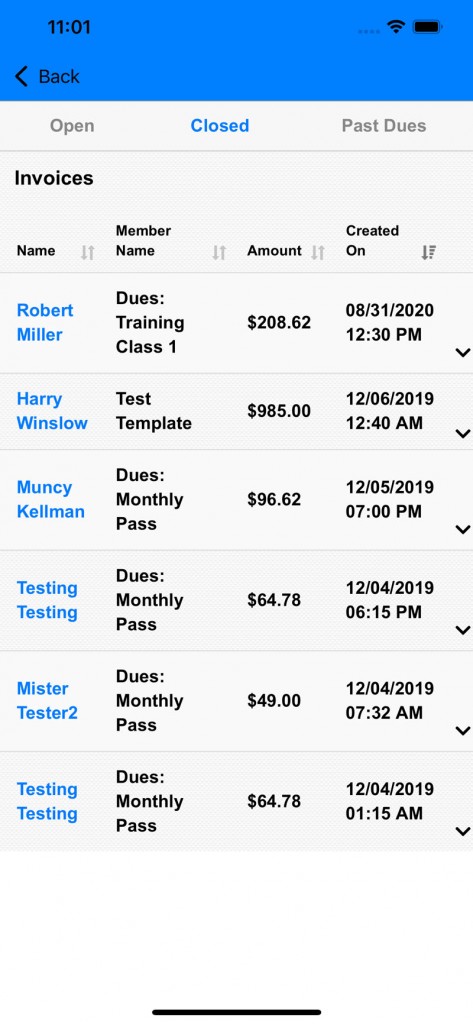
4.) Expand one of the invoice to see more information about it.
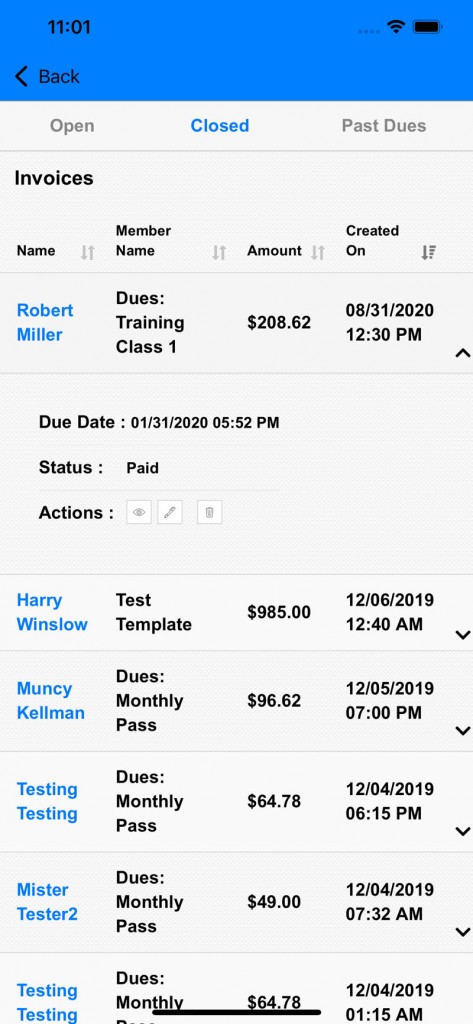
5.) Click on the first edit icon to edit it:
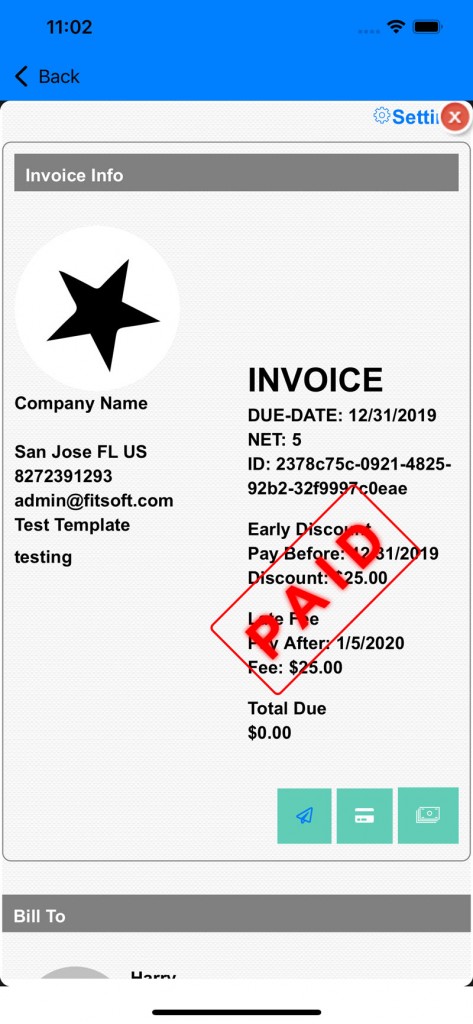
6.) At the list of invoices, click on the action, eye icon (second icon) to view the invoice:
7.) Go to "Past Dues":
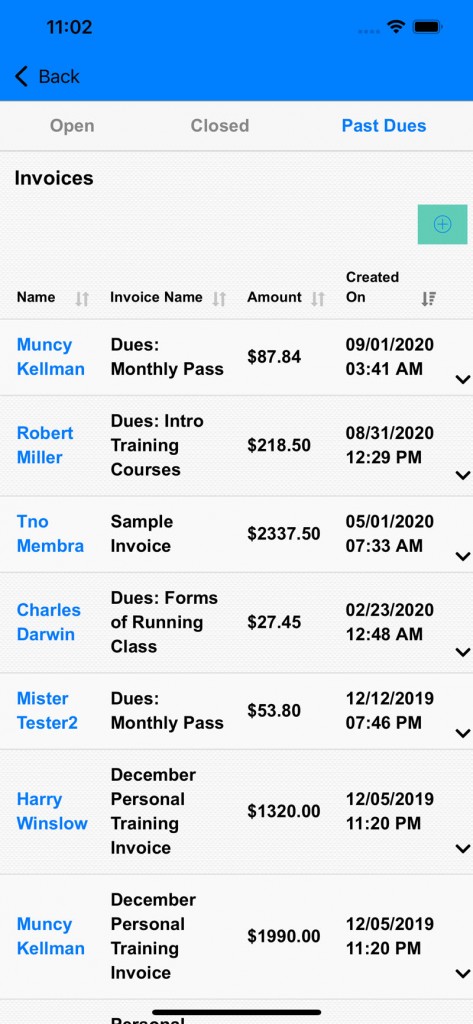
8.) Expand one of the past due invoice:
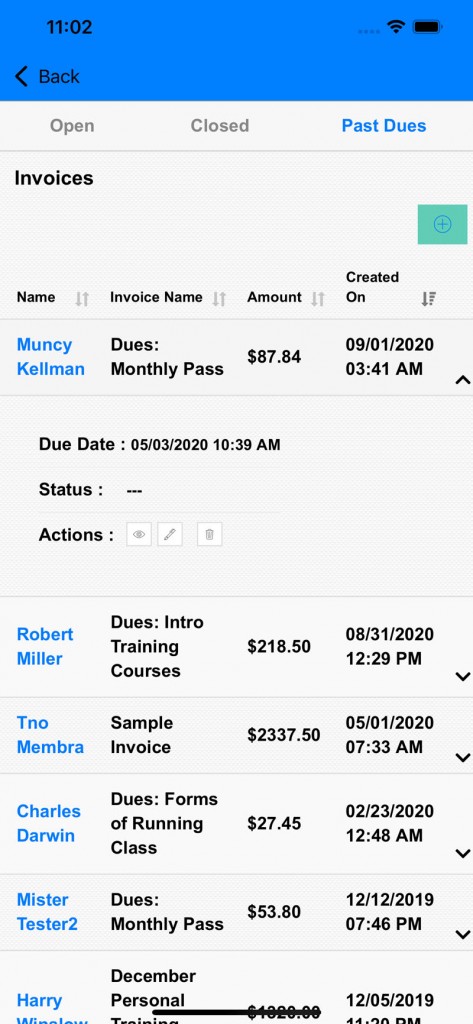
9.) Click on the eye icon to view the invoice:
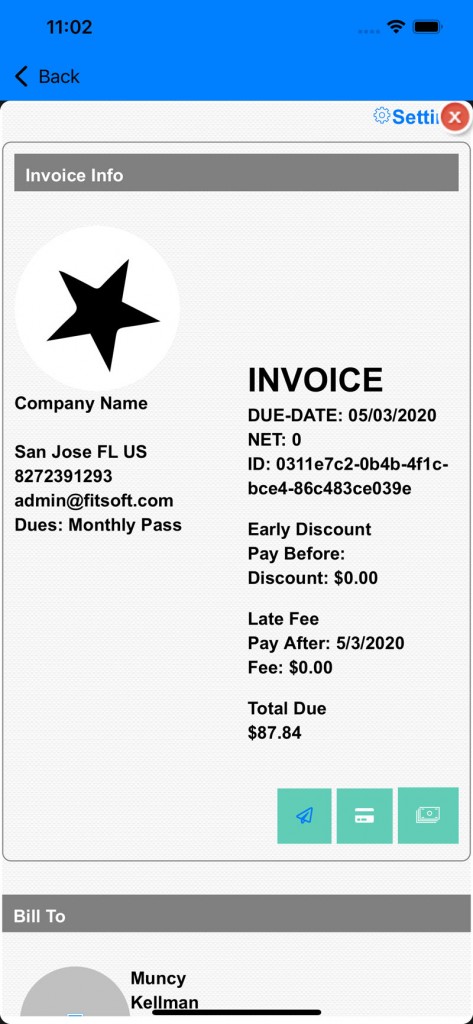
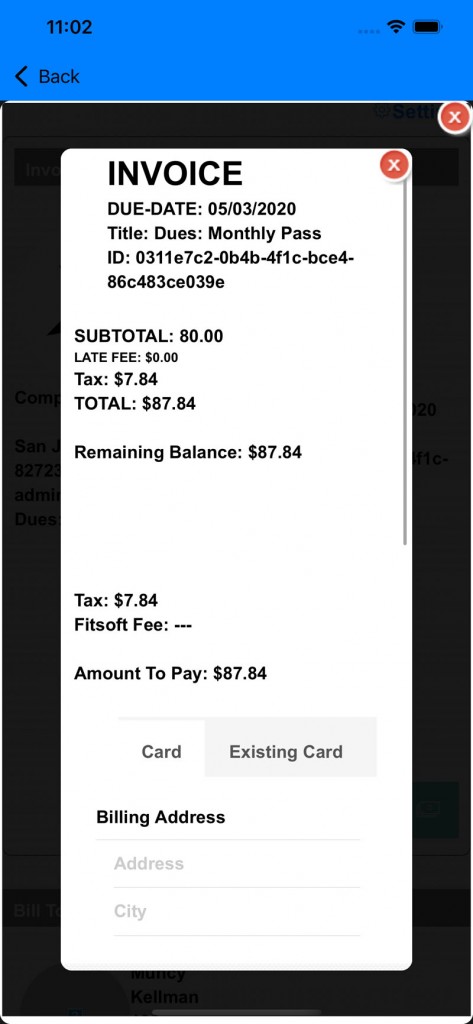
10.) Click on the credit card icon or cash icon to reconcile the invoice:
You can also click on the email icon to send an email reminder to the member the invoice.
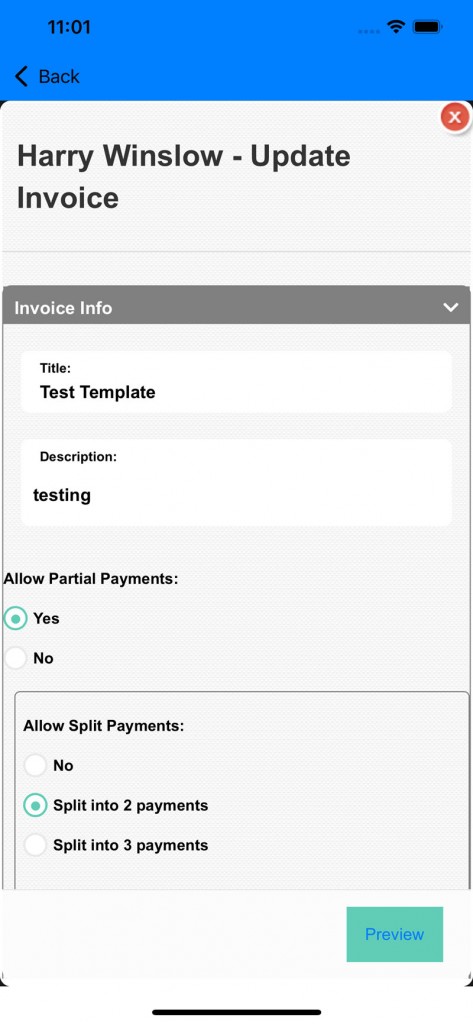
11.) Click on the edit pencil icon allows you to edit the invoice:
There is partial payments for the invoice or split payments. Also optional reward or penalty settings for the invoice:
Reports
Settings
Below are settings for each part of the GagaClass Admin app:
Information
GagaClass Settings - Cache
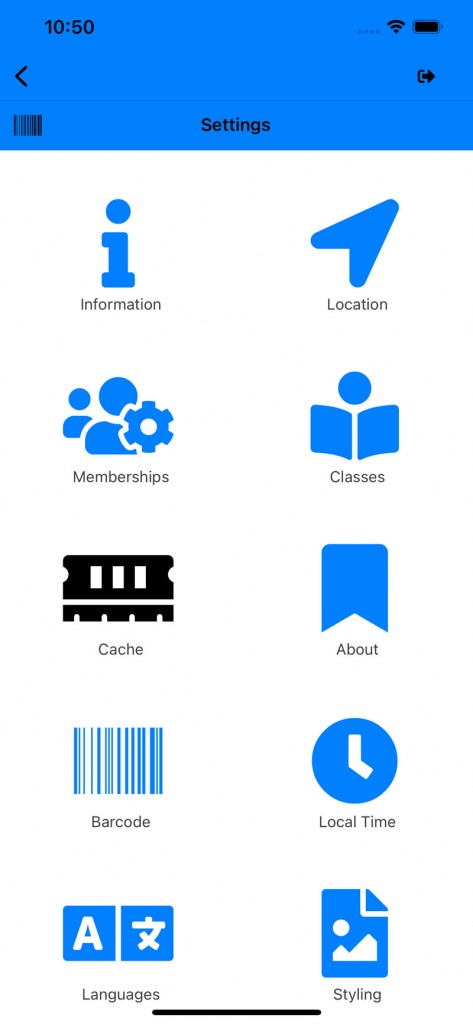
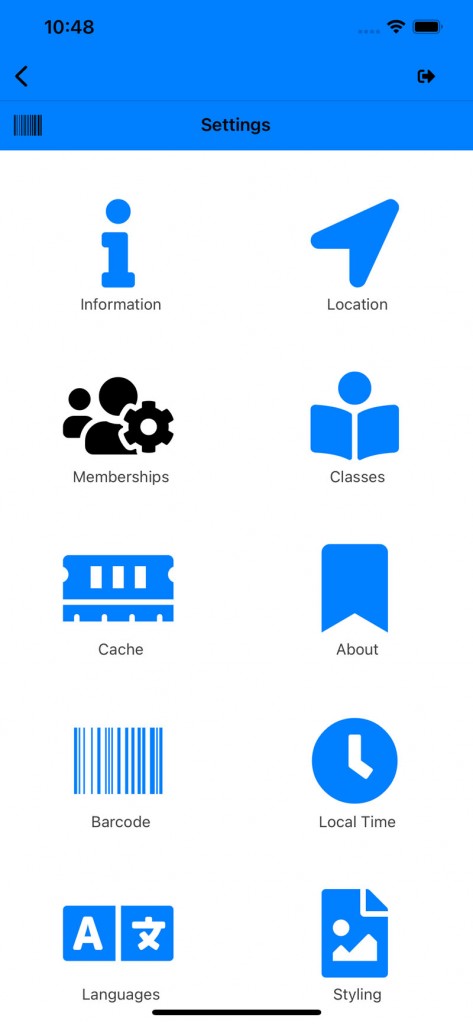
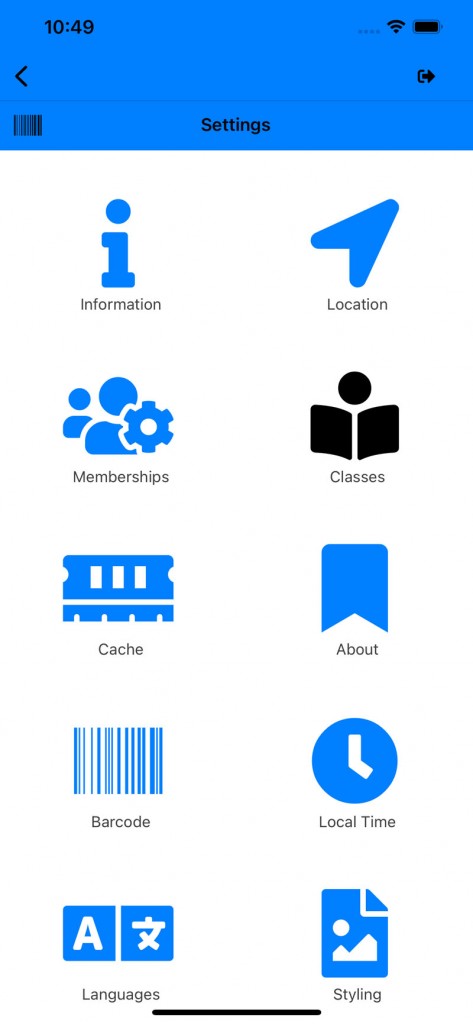
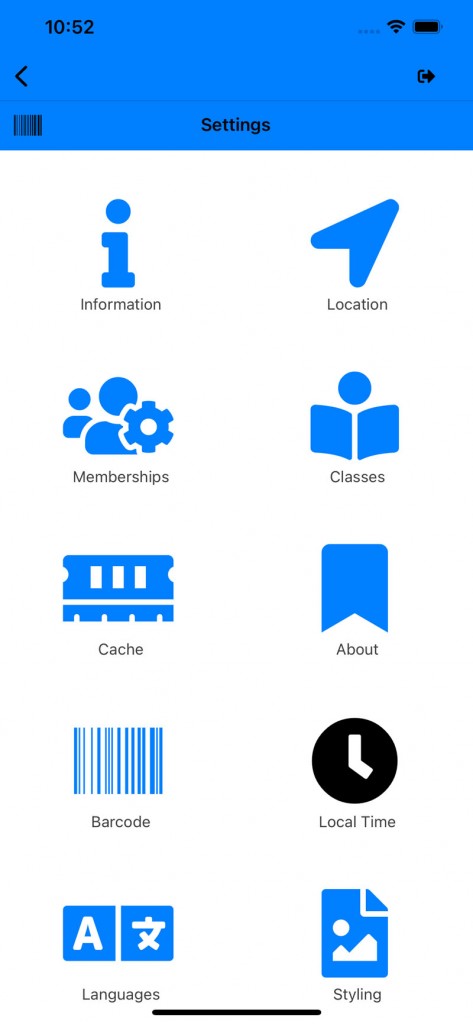
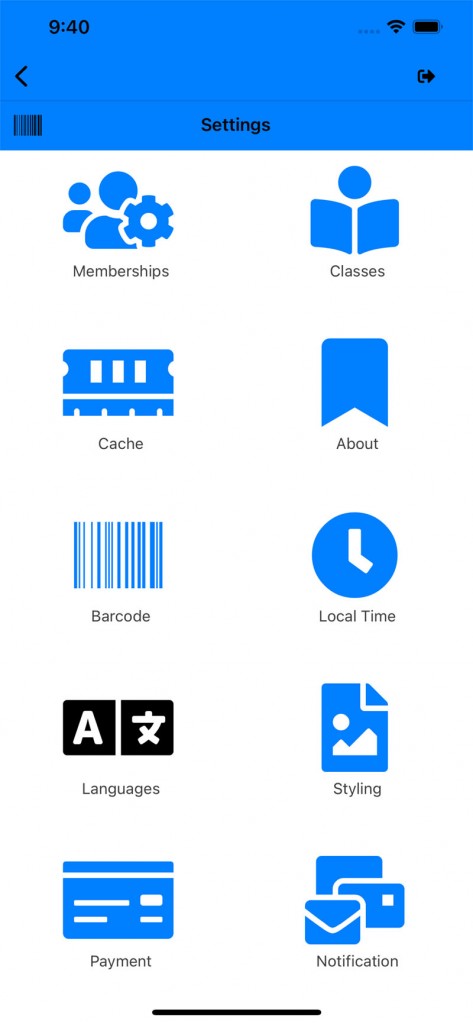
1.) Go to your Dashboard and click on "Settings":
2.) Click on the "Cache" icon:
3.) This will open the Cache page:
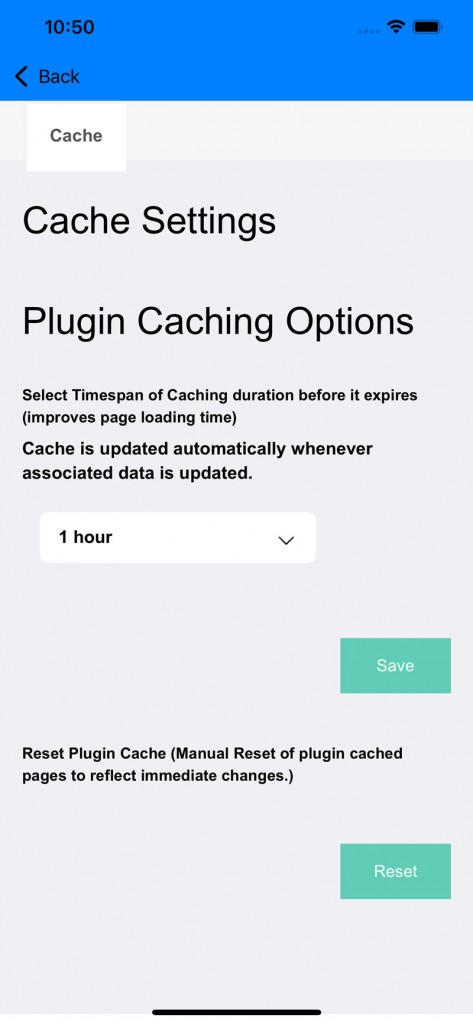
a.) There is an option on how frequent your cache gets updated. Set the time that the cache gets updated.
b.) If you need to reset your site cache you can also do it here.
Membership
GagaClass Settings - Memberships
1.) Go to your Dashboard and click on "Settings":

2.) Click on the "Memberships" icon:
3.) The membership page will open along with its options:
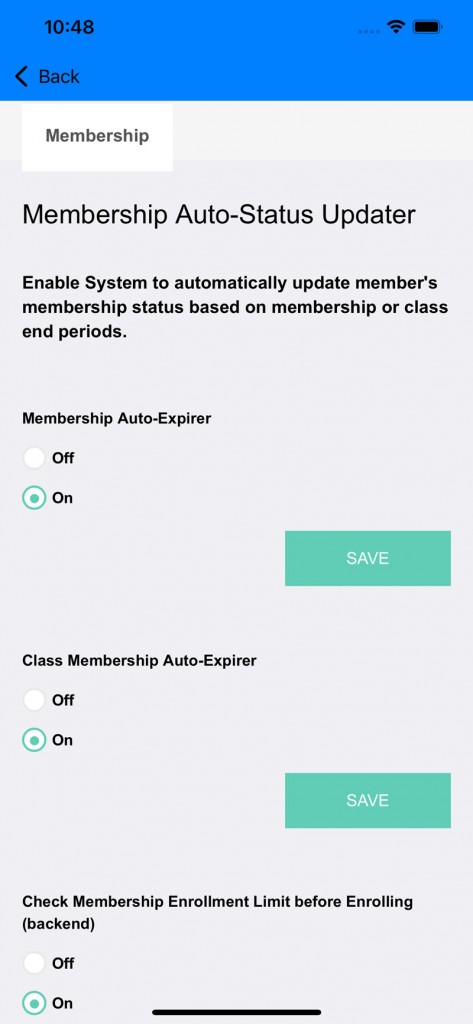
a.) Auto-Expirer are options to have the system automatically disable the membership or class membership when it expires or at the end of its term.
b.) "Check Membership Enrollment Limit before Enrolling (Backend)" option is there because in the backend there is no limit on class package enrollment for members.
So you can enroll a member who has 0 remaining class credit into other classes that exceeding their remaining credit(s). Only admins can do this. The backend system do not check if the member exceed their class package limits and stop the admin from enrolling them. But if you want the system to check then turn it on.
4.) Scroll down to "Membership Enrollment Fee":

This is the global enrollment fee you are charging and it applies to all membership(custom, general, and class memberships). You can leave it global enrollment fee here blank and add in the enrollment fee when creating the memberships.
5.) Auto-renew the recuring memberships here. This global settings will auto-renew the member's memberships.

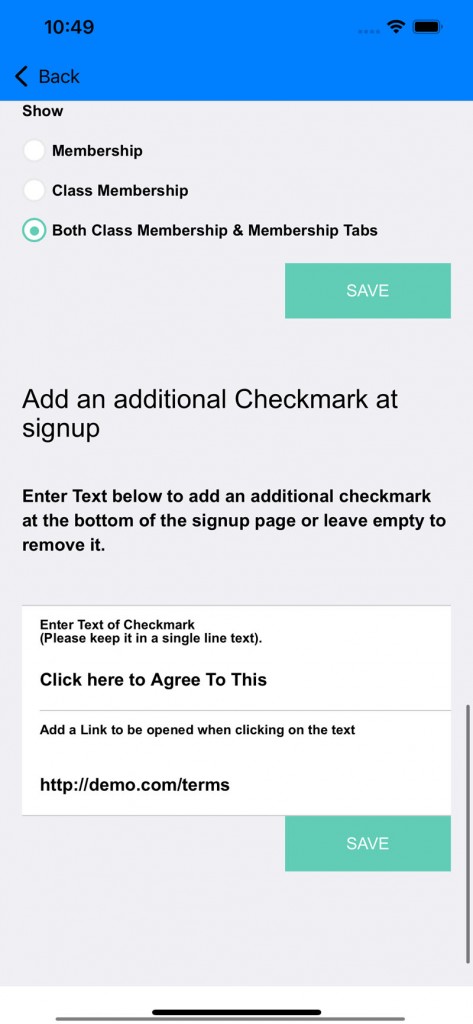
6.) Class membership and other memberships display option can be managed here. You can turn on off and leave the other one one. If you wish for people to sign up to your gym or facility first before enrolling into a class then select "Membership" only.
7.) Scroll down and add in your own Terms of Conditions or policy mandates. This will display on your signup page.
Classes
GagaClass Settings - Classes
1.) Go to your Dashboard and click on "Settings":
2.) Click on the "Classes" icon:
3.) The class options page will open:
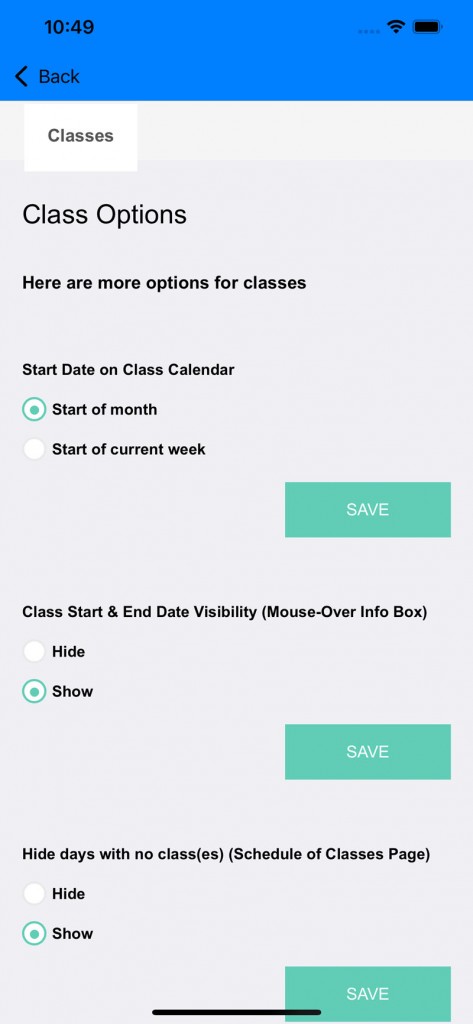
a.) "Start Date on Class Calendar" option is how the calendar page displays the starting date on the frontend in desktop view.
b.) "Class Start & End Date Visibility" option is for the mouse-over info box. You can hide it or display it.
c.) "Hide days with no classes" option is for the schedule of classes page. This removes the days with no classes on the "Schedule of Classes" page. This helps users find an active class quicker and populate the page with active classes.
4.) Scroll down to "Booking Time Limit":
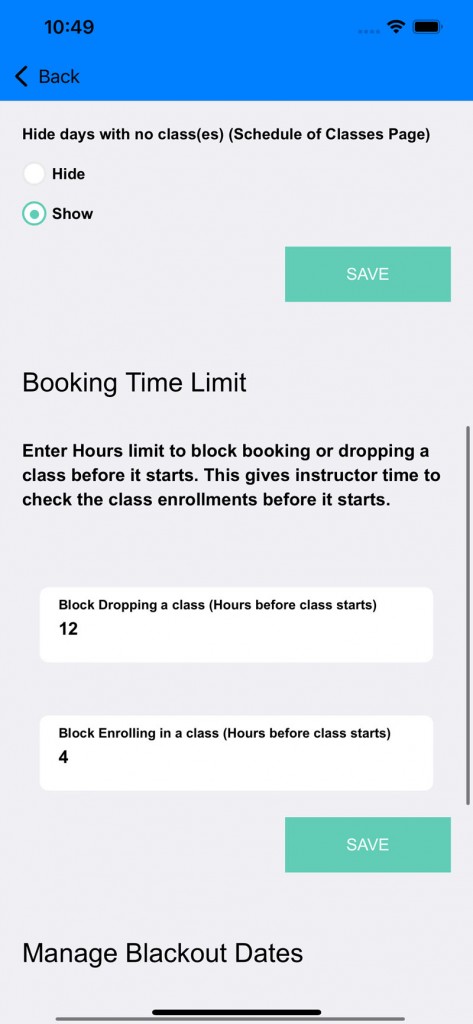
a.) "Block Dropping a class" option prevents members or students from dropping a class a certain hour before the class stop. In a scenario where the class is small and the instructor needs to be present and students drop the class on late notice, this option prevent students from doing this hour(s) before class starts.
b.) "Block Enrolling before class starts" option prevents members or students from enrolling in a class a couple of hour(s) before it starts. If the class needs a head count of students and some time to properly prepare the class, then you need to set the hours allowing students to enroll into the class. Sometime having too many students into a class at late notice and the lack of preparation can be avoided if this option is enabled.
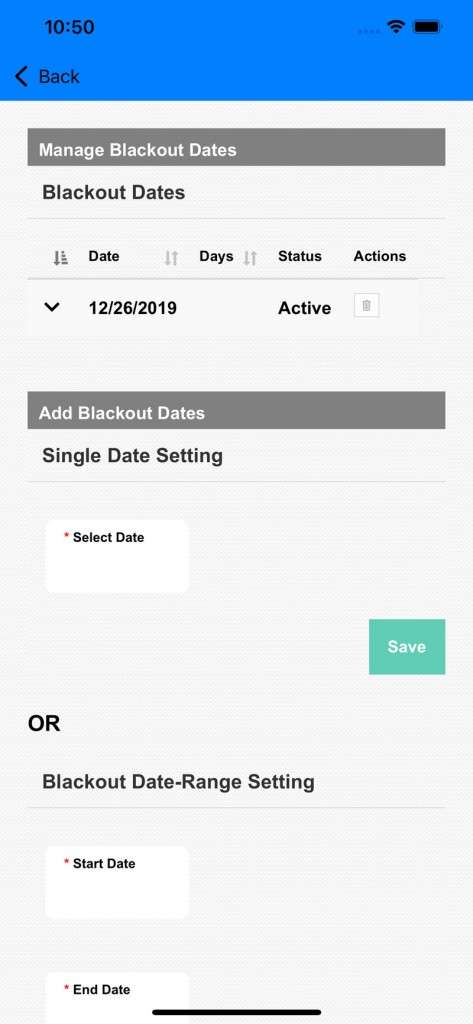
5.) Scroll down and click on "Manage blackout dates" icon. This is a global setting to block dates for "ALL" classes. Commonly used for holidays and vacations.
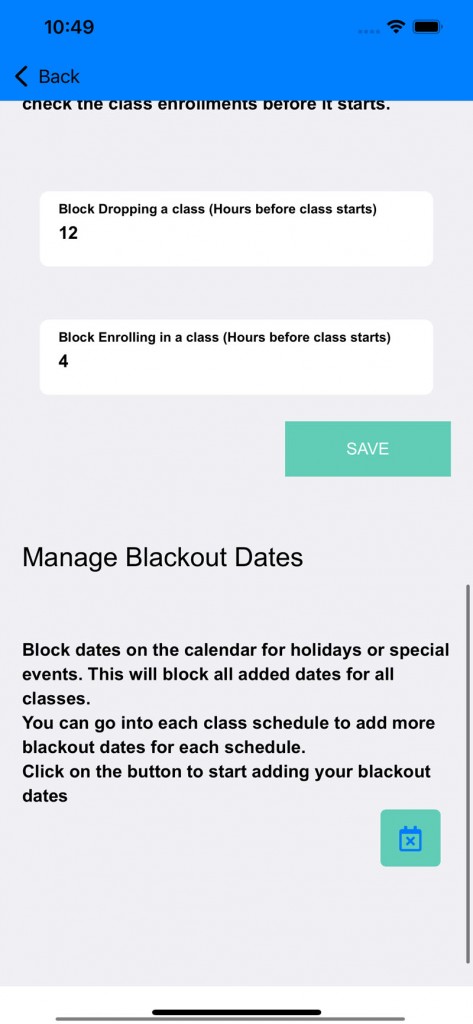
6.) Click on the icon and you will see the blackout dates option. You can add in a single date or a full range of dates.

Payments
GagaClass Settings - Payment
1.) Go to your Dashboard and click on "Settings":
2.) Click on the "Payment" icon:
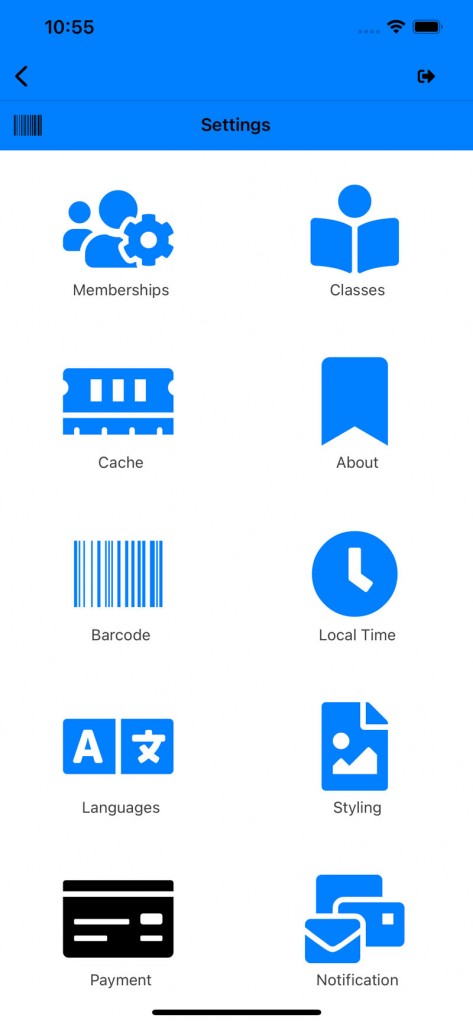
3.) A payment option page will open:
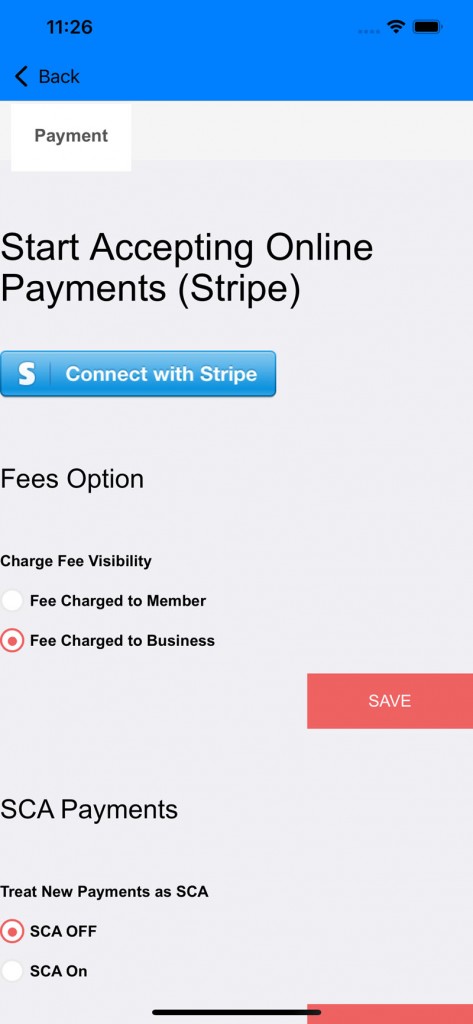
a.) Stripe is Required to process credit card payments. There is no monthly payment and credit card fee is low. Click on the Stripe button to get started with your Stripe account. If you already have one, you can just connect it to this app.
b.) There are a couple of option to delegate the software fees here. You can delegate it to the members or absorb the software transaction fee.
c.) For European countries that requires SCA payments, you need to have SCA on. This is a second permission layer when processing credit card that alerts/request permission on a charge or recurring charge.
4.) Scroll down to Testing options:
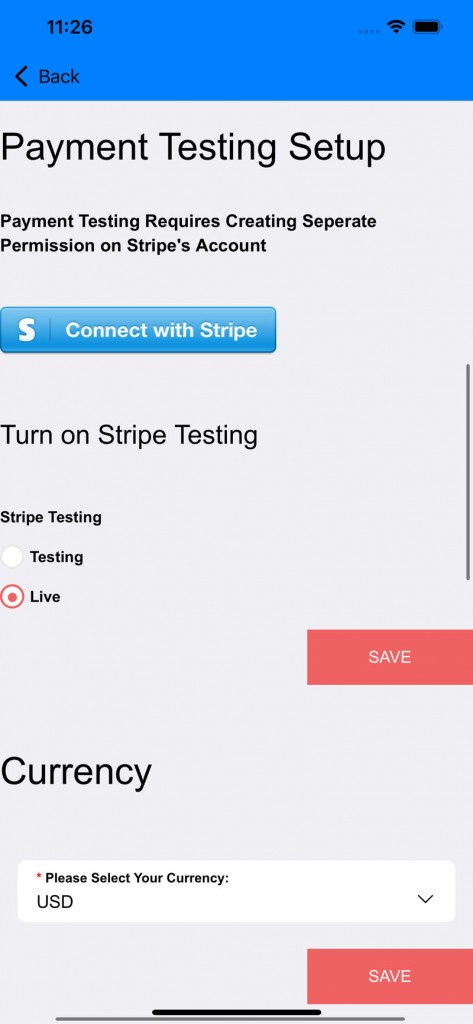
a.) There are two Stripe connect: one for testing and the other one for Live. There is an option for this here to turn it on to Live/Testing. Once you are ready you can turn it to Live mode.
b.) Select your currency
5.) Scroll down to Tax Rates and Form options:
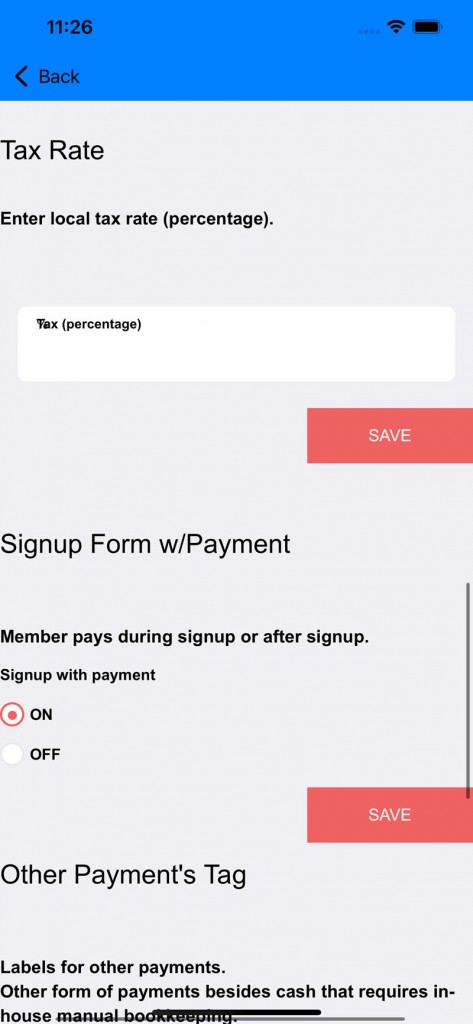
a.) Add in your tax percentage rate (ie San Francisco CA 8.5%). This is optional depending on your location.
b.) "Signup Form w/Payment" option : You can elect to have your signup form without asking for credit card info until later during signup.
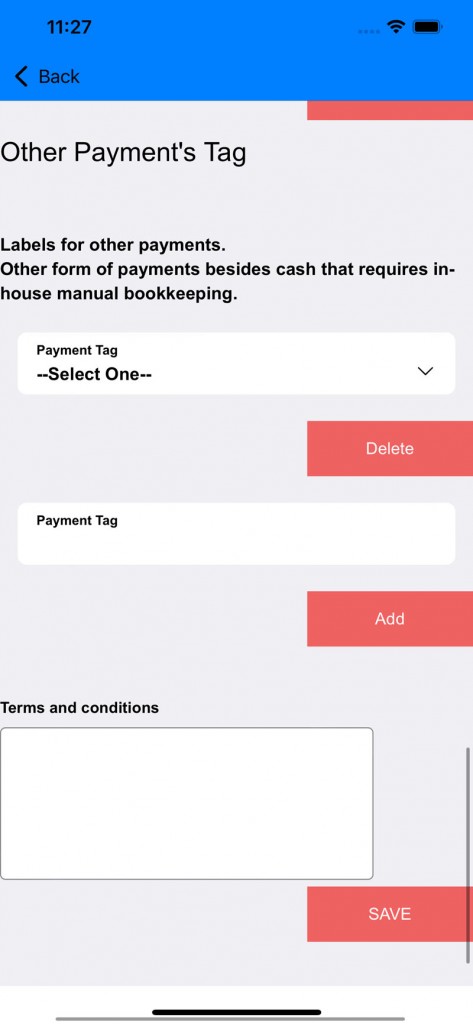
6.) Scroll down to "Other Payment's Tag"
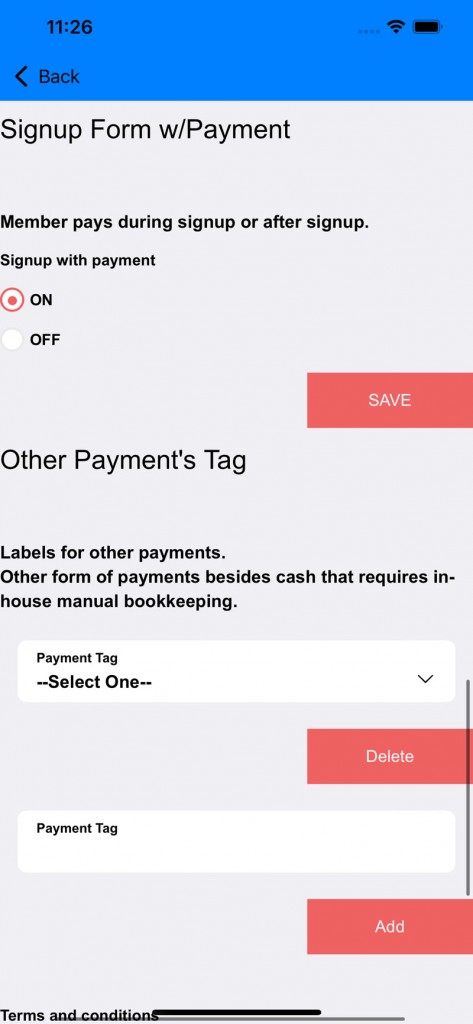
a.) Some facility might collect other form of payments or designate internal staff payment as a short abbreviation or codename. You can add this form of payment here.
When enrolling members from the app, you can select this form of payment under the "Others" tab. These other payments that are processed are also under the payment history area.
7.) Scroll down further to add in your own terms and condition on the signup page.
Cache
GagaClass Settings - Cache
1.) Go to your Dashboard and click on "Settings":
2.) Click on the "Cache" icon:
3.) This will open the Cache page:
a.) There is an option on how frequent your cache gets updated. Set the time that the cache gets updated.
b.) If you need to reset your site cache you can also do it here.
Local Time
GagaClass Settings - Local Time
1.) Go to your Dashboard and click on "Settings":
2.) Click on the "Local Time" icon:
3.) Timezone is important to set because your classes and calendar is dependent on this. Set your timezone and date-time format:

Language
GagaClass Settings - Language
1.) Go to your Dashboard and click on "Settings":
2.) Click on the "Languages" icon:
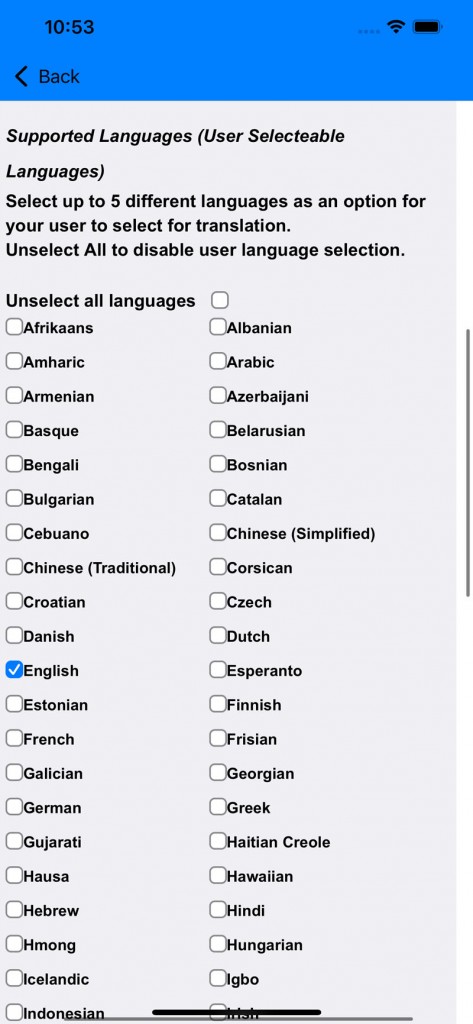
3.) The language option will open. These options are for the plugin integration for your website and what language users can select on your site through the plugin.
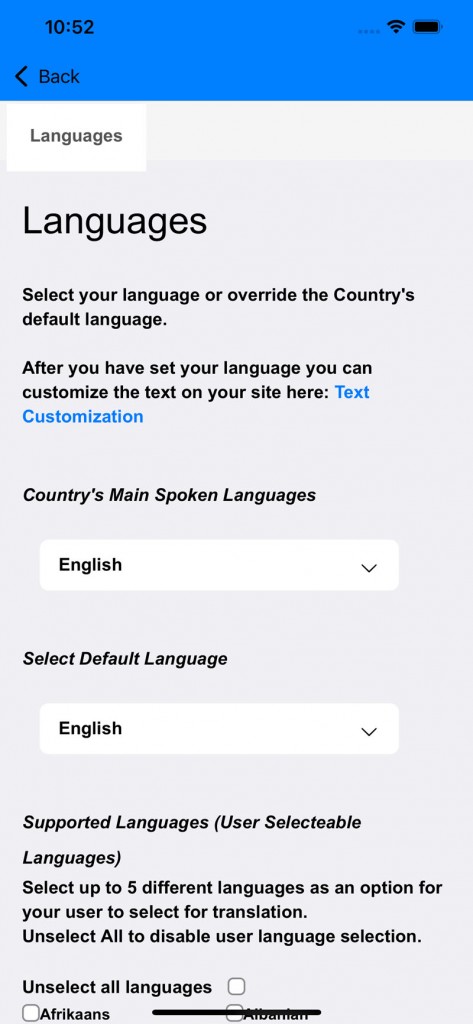
4.) When more than 1 language is selected, a dropdown list will appear on the plugin allowing users to select a language from the list.
Styling
GagaClass Settings - Style
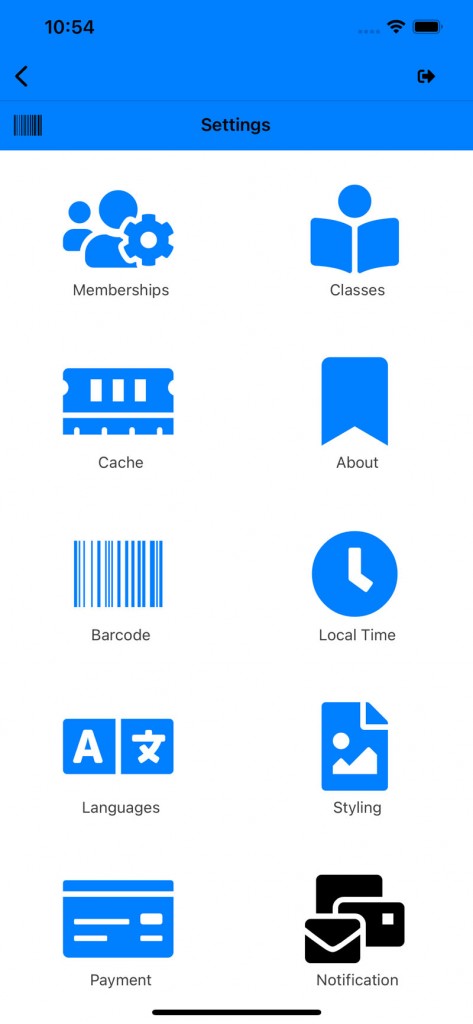
1.) Go to your Dashboard and click on "Settings":
2.) Click on the "Styling" icon:
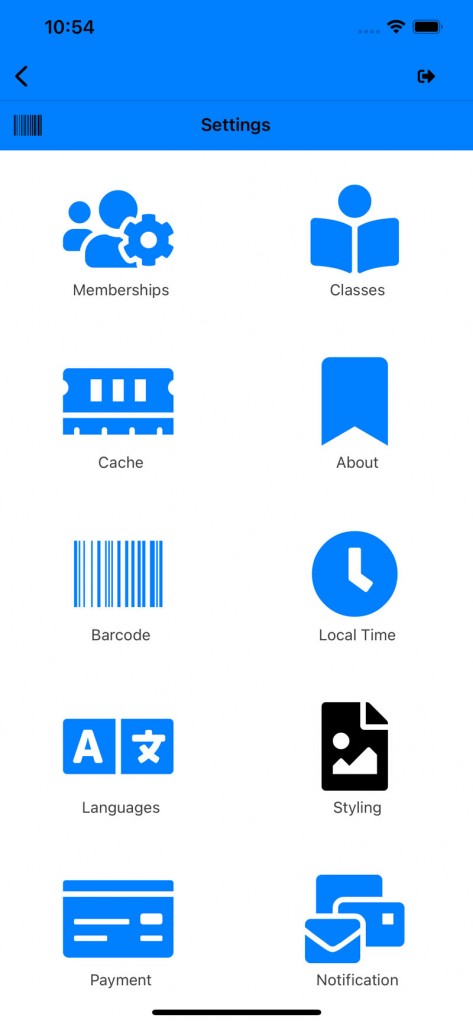
3.) The styling page will open.
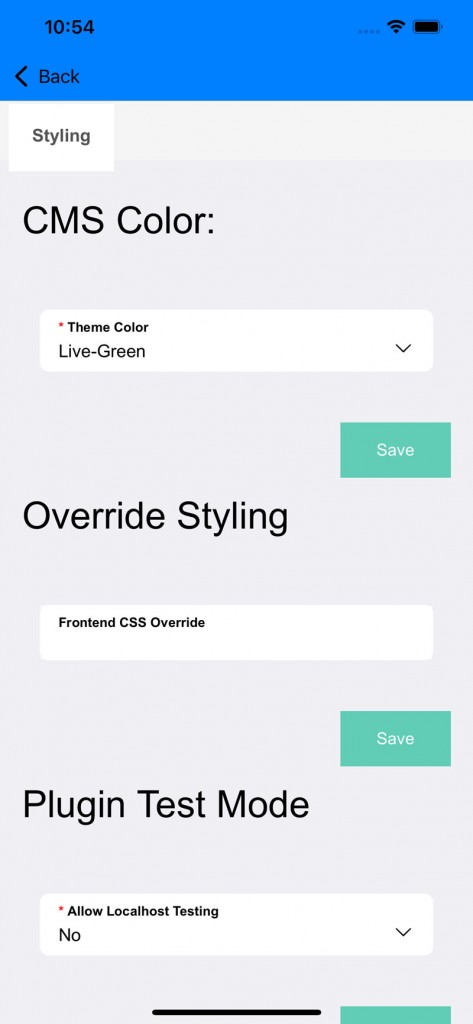
Changes to colors can be made here to the cms. There are a section for preliminary css override for the frontend.
4.) Scroll down to "Plugin Mobile View On"
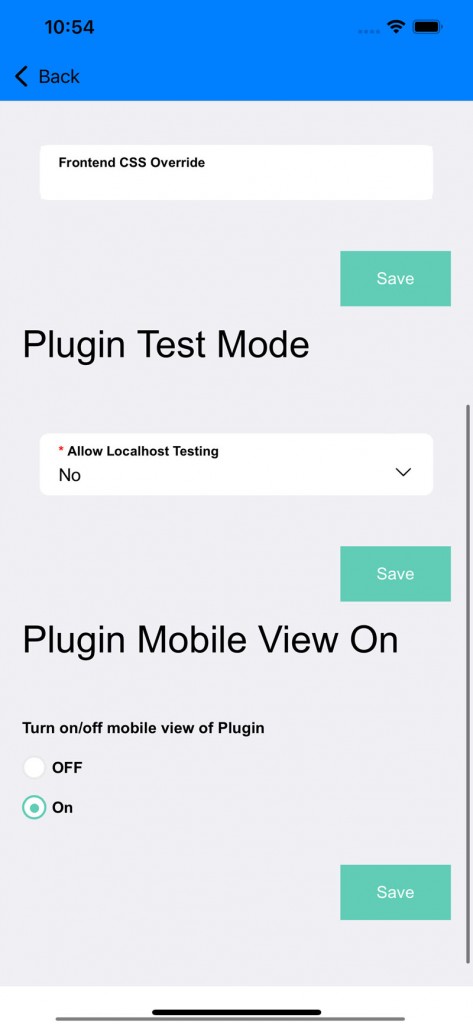
By default the mobile view is on for frontend pages. If it is turned off, it will default back to the original pages without mobile support.
Notification
GagaClass Settings - Notification
1.) Go to your Dashboard and click on "Settings":
2.) Click on the "Notification" icon:
3.) A notification option page will open:
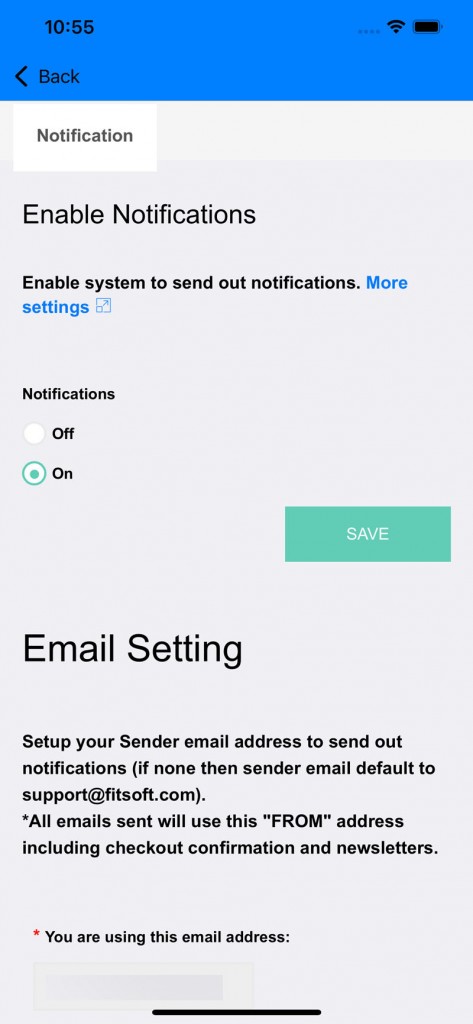
a.) Click on "More Settings" you can turn off the email for success/failed payments and payment reminder email.
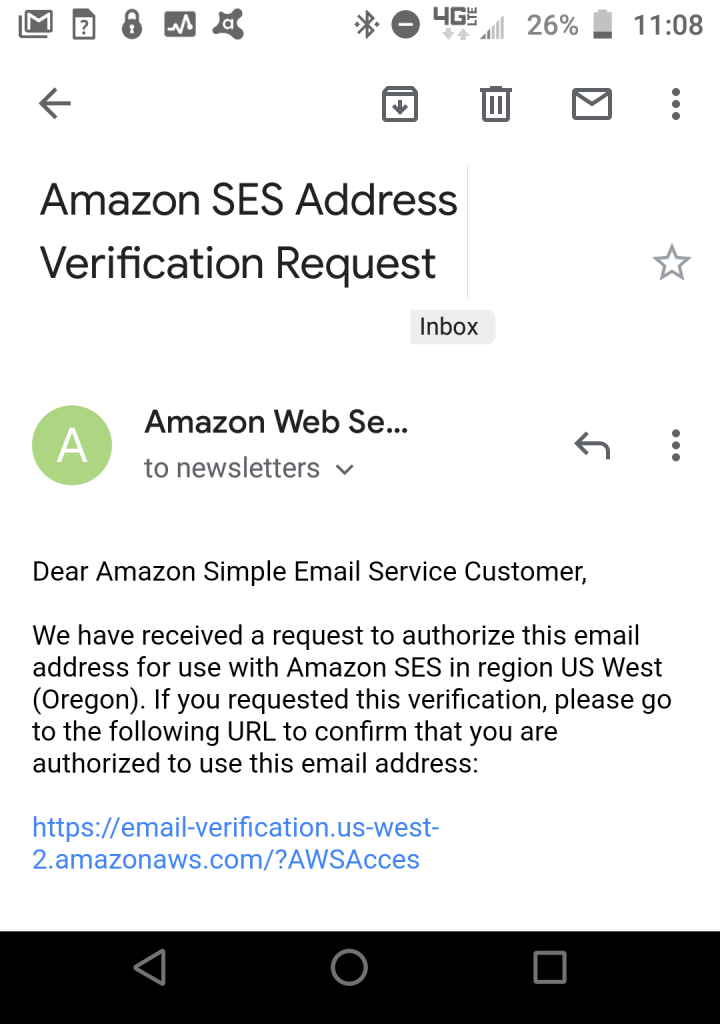
b.) Add in an email address that can be used to send out your membership notifications and reminder emails.
Once you add in your email address, you will need to confirm the email. The confirmation email will be sent from Amazon SES. There is a limited timeframe to confirm:
4.) Scroll down to the option below to test the email being sent using the email that you have added:
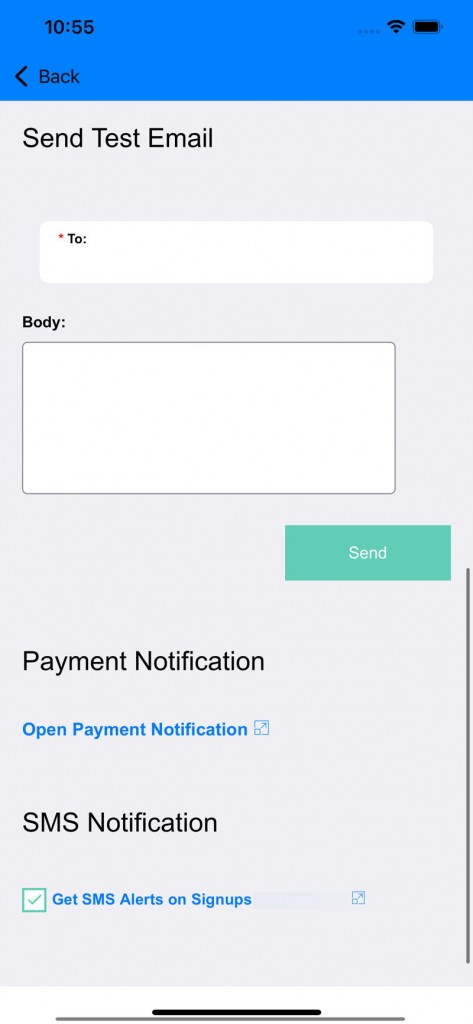
a.) other options includes "Payment Notification"